Skip to content
paysagement
Guide · Pool deck

Building a paver pool deck

How to build a paver deck around an existing in-ground pool: the coping detail, the pool's private lines, a slope that sheds water away, careful compaction near the wall, and the provincial rules on the enclosure and its gates. Quantities, depths and hours come from the calculator.
Level : Pro recommendedDraftReviewed October 10, 2026Next review: April 10, 202740 sources
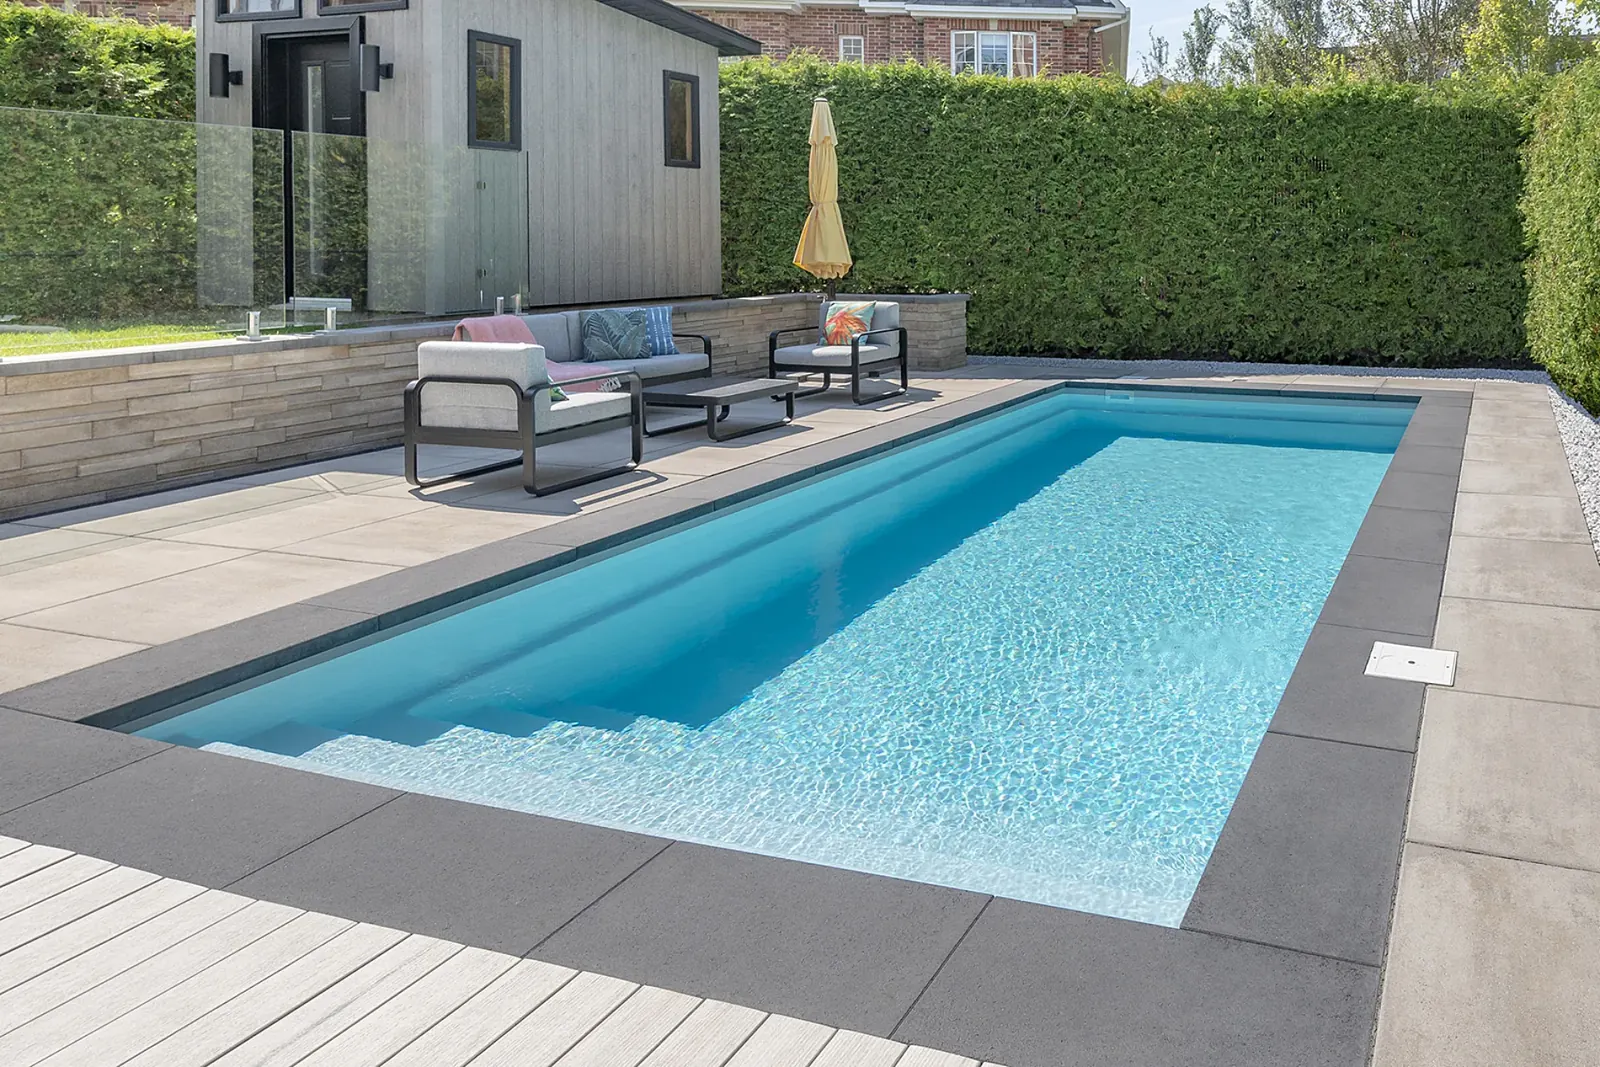
Proma XL caviar coping and slabs around a rectangular in-ground pool
Photo: Rinox
Draft.This guide is a draft. It has not yet been reviewed by an experienced installer or an engineer. Quantities and times come from the engine; the text may still change.
In this guide

Your project

The guide's typical project: 41 m² (442 sq ft), unknown fill soil. The quantities below come from the calculator and drive every time in this guide.
MaterialQuantity
Spoil to haul away (excavated soil)38.84 t
Non-woven geotextile104.9 m² (1,129.2 sq ft)
MG-20 crushed stone (0-3/4 in) for the base37.28 t
Edge restraint41 m (134.4 ft)
Edge spikes138
Concrete sand for the bedding1.57 t
Pavers or slabs, cutting waste included51.2 m² (550.8 sq ft)
Polymeric sand (bags)6 bags
Computed for: Quebec (province)
Estimated total working time
Beginner
287 person-h202 to 417 person-h
Intermediate
198 person-h155 to 257 person-h

The total and each step's time come from the same calculation as the estimator: the steps plus machine learning add up to the total. Planning steps (locate request, permits) keep the guide's fixed time.

  1. 01Pavers or slabs

    60 mm (2.4 in)

    The only layer you see, and the quickest to lay when everything below it is right.

    If corners are cutMisaligned pavers and uneven joints. The cause is usually in the layers below.

    Why
  2. 02Polymeric sand

    joints

    Fills the joints, locks the pavers together, slows weeds and erosion.

    If corners are cutPlain sand: joints wash out, pavers move, weeds move in.

    Why
  3. 03Concrete sand bedding

    25 mm (1 in)

    A thin layer, screeded level, that gives the flat surface. It does not fix an uneven base.

    If corners are cutStone dust or too thick a bed: water stays trapped, the bed shifts and dips appear.

    Why
  4. 04MG-20 crushed stone base

    300 mm (11.8 in), in 3 lifts

    The heart of the job. It carries the loads, drains water and limits frost effects. It is spread and compacted in thin lifts.

    If corners are cutA base too thin or compacted in one go: settling and frost heave.

    Why
  5. 05Geotextile

    membrane

    On clay or silt, a fabric separates the stone from the fine soil so the two do not mix.

    If corners are cutWithout geotextile on fine soil, the base sinks into the soil within a few years and loses its bearing capacity.

    Why
  6. 06Native soil, excavated and compacted

    385 mm (15.2 in) in total

    The soil is dug to the computed depth, sloped and compacted. The base does not go below the frost line: it drains.

    If corners are cutDigging too shallow to save on the bin: the base is thin and the patio follows the soil's movements.

    Why

Thicknesses computed for: 41 m² (442 sq ft), unknown fill soil

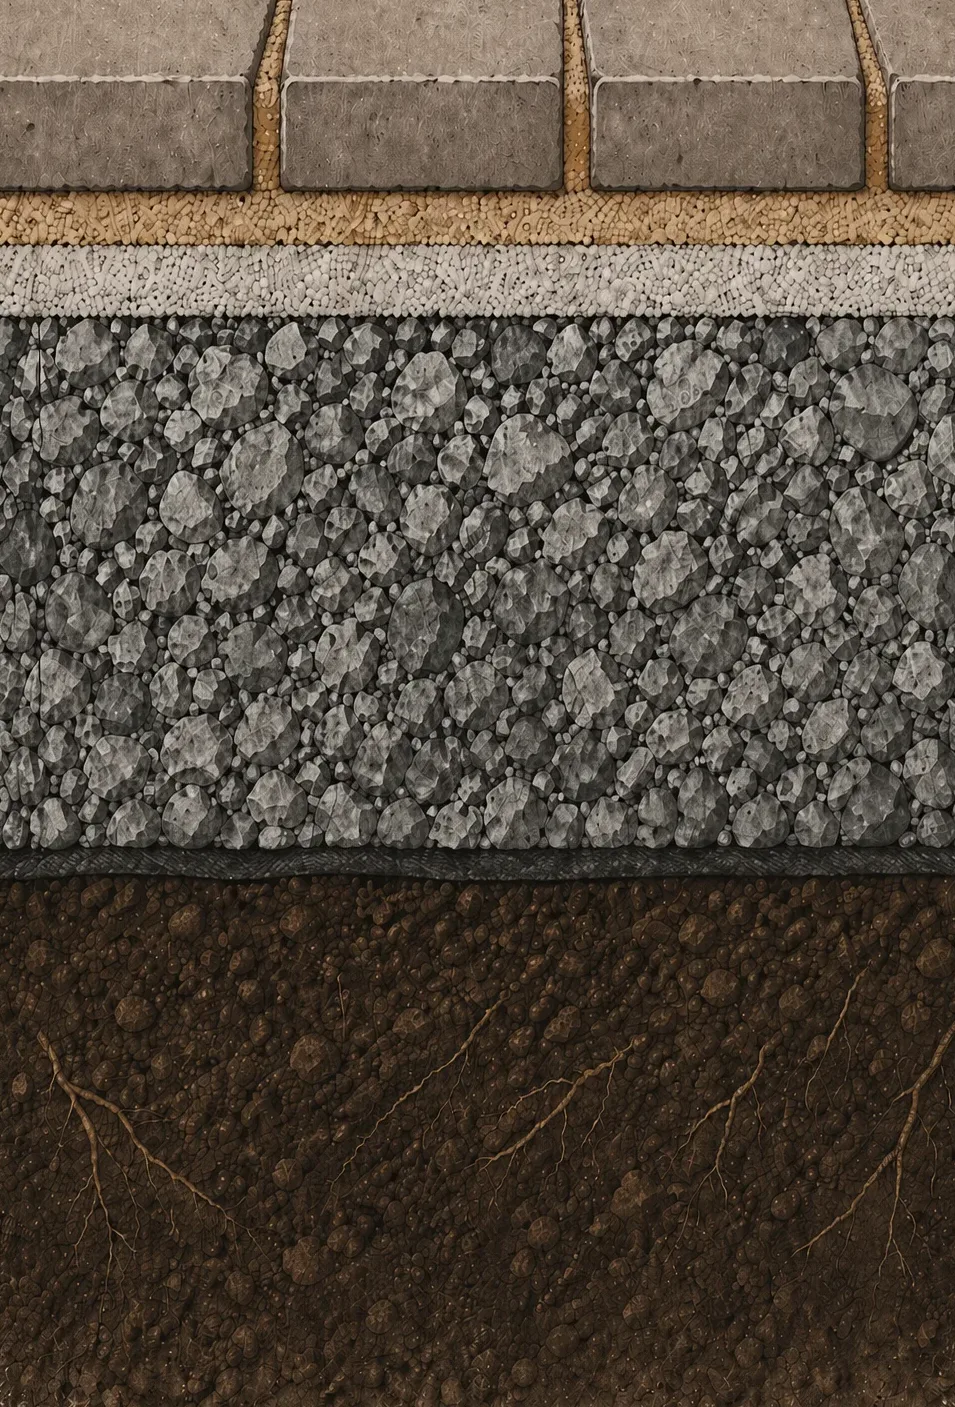
Cross-section of a paver patio: pavers, polymeric sand joints, bedding, compacted crushed stone base, geotextile and native soil.
Phase 1 · Assessment

Assess the pool and its surround

A pool surround is a patio at the water's edge: splashing, bare feet, treated water. Three existing elements drive the work: the pool itself, with its wall, coping and lines; the enclosure that controls access; and the equipment with its power supply. The soil around an in-ground pool is often disturbed backfill, hence the cautious assumption in "Your project".

  1. 01Measure, sketch and choose the product[1, 2, 3]

    Measure the area to pave and draw it to scale, on paper or with the measuring tool.

    • Write down the length of each side and what it meets: nothing (a free side), the house, a step, a slab or existing paving.
    • A free side needs an edge restraint and a base that extends past the pavers. A side against the house or a step needs an isolation joint.
    • Mark on the sketch where water must drain.
    • Choose the product (paver or slab, thickness, formats) and the pattern. Angled patterns such as 45 degree herringbone or circles multiply cuts and waste.

    Enter these values in "Your project": every quantity in this guide comes from them.

    Note the coping shape, the surround width you want and where the enclosure, its gates and the equipment are. The side against the coping is cut, but it is not a free side.

    Done when : The sketch gives the area, the length and type of each side and the drainage direction, and the same values are entered in "Your project".

  2. 02Inspect the pool, coping and enclosure[4, 5]

    Three existing elements drive the work: the pool, its enclosure and its equipment.

    • The pool. Note its type (fiberglass, vinyl liner, concrete) and its coping. Ask the maker or installer for their deck detail: how the paving meets the coping, what may bear on the wall and how to compact near it.
    • The lines. Using the plans or the installer, find the pump, skimmer and return pipes, the lighting and power cables, the bonding conductor and, if any, the heater's gas line.
    • The enclosure. Check that it is at least 1.2 m high, that a 10 cm sphere passes nowhere and that every gate closes and latches by itself. An installation from before 1 November 2010 must comply by 30 September 2027.
    • The equipment. Pump, filter and heater must be more than 1 m from the pool wall or enclosure, except where the regulation allows otherwise.

    Done when : You have the maker's or installer's deck detail, the pool lines are marked on the ground, and you know whether the enclosure and equipment comply.

    Safety : Do not touch any pool cable or electrical box: turn power off at the panel only if an electrician tells you to.

  3. 03Assess the soil and where water goes[2, 6, 7]

    The base thickness depends mostly on the native soil. Sand and gravel drain well. Silt and clay hold water and swell when they freeze: they need a markedly thicker base and a geotextile.

    • Look at the soil in a garden bed or a hole that is already open. A handful of moist soil that rolls into a sticky ribbon is clay; soil that crumbles and feels gritty is sand. Do not dig a test hole before the locate is done.
    • If unsure, choose "I don't know": the calculation treats it as clay, the cautious assumption.
    • Find the downspouts. Extend them so they discharge onto lawn, away from the foundation, and not onto the paving.
    • Decide where surface water will go: to the lawn, a drain or the street, never toward the house. Do not send it to the neighbour in a way that makes their situation worse.

    Around a pool, the slope runs from the water toward the lawn, a drain or a channel: surface water must never flow back into the pool or seep behind the coping.

    Done when : A soil class is chosen (or "I don't know"), every downspout has an outlet that misses the paving, and the surface drainage direction is decided.

Phase 2 · Permits and locates

Permit, enclosure and locates

In Quebec, a municipal permit is required to build anything that gives or blocks access to a pool, and the permit holder must control access during the work. Around a pool, most pipes and cables are private: Info-Excavation does not locate them.

  1. 01Request a utility locate from Info-Excavation[8, 9, 10, 11, 12]

    Make a free request to Info-Excavation, online or by phone, before digging, even for a small area. The RBQ asks contractors to file it at least 4 business days before the work: allow the same lead time. The request stays valid until the stated end date, for at most 180 days.

    • Describe the exact area, including the extra base width.
    • Member network owners mark their lines on the ground with paint or flags, or confirm there is nothing.
    • Some networks, including those of some municipalities, are not members: call them directly.
    • Members locate their own networks. Lines that belong to you (feed to a garage or shed, drains, irrigation lines) are yours to find.

    Around a pool, most lines belong to you: pump and return pipes, lighting and pump cables, the bonding conductor, the heater's gas line. Find them with the installer's plans and dig by hand around them.

    Done when : You have a request number, every network concerned has answered with ground marks or a clear notice, and the marks will still be visible on digging day.

    Safety : Never dig by machine within 1 m of either side of a mark: expose the line by hand. If you damage a cable or pipe, move everyone away, do not touch it and call its owner; if you smell gas, call emergency services.

  2. 02Get the permit and plan the enclosure[4, 13]

    The provincial regulation requires a municipal permit to build anything that gives or blocks access to a pool. A new surround almost always touches the enclosure or its gates: apply before ordering. Municipalities may be stricter than the regulation.

    Draw the final enclosure on your sketch:

    • at least 1.2 m high, measured from the finished surface;
    • no opening that lets a 10 cm sphere through, no hold for climbing, chain-link mesh openings of at most 30 mm;
    • every gate closes and latches by itself, with the latch on the inside at the top of the gate or on the outside at least 1.5 m above ground;
    • a hedge does not count as an enclosure;
    • a fixed structure that could be used to climb, such as a low wall, a fixed bench or a raised planter, stays at least 1 m from the pool wall or enclosure.

    Done when : The permit is issued or the municipality confirms in writing that none is needed, and your plan shows a compliant enclosure, its gates and no climbing aid within 1 m.

  3. 03Control access to the pool during the work[4]

    During the work, the permit holder must control access to the pool. An open work site around a full pool is a drowning risk for neighbourhood children.

    • Before opening a section of the enclosure or removing a gate, put up a temporary fence that fully closes off access.
    • At the end of every day, check that the pool is fully surrounded and that the gate closes and latches by itself.
    • Keep the pool covered during cutting and jointing to protect the water from dust, sand and cutting slurry.

    Done when : At the end of every work day, the pool is surrounded with no gap, by the enclosure or a temporary fence, and the gate closes and latches by itself.

    Safety : Never leave the site with the enclosure open, even for a few minutes.

  4. 04Plan deliveries, rentals and disposal[14, 15, 16, 17]

    Book everything at once so the steps follow each other without waiting.

    • Stone and sand are sold by the metric tonne or by the cubic yard. A 10-wheel truck delivers up to about 15 tonnes; beyond that you need a second trip or a 12-wheel truck. Your quantities are in "Your project".
    • Pick a firm unloading spot close to the work, covered with a tarp, that the truck can reach without damaging the lawn or existing paving.
    • Compare rental periods: a weekend or a week often costs less than several separate days.
    • Plan spoil disposal (container, truck or ecocentre) under your municipality's rules. Excavated soil takes more volume than it did in the ground.
    • In spring, load restrictions during the thaw can delay deliveries.

    Plan how the machine and wheelbarrows will get in without leaving the enclosure open, and protect the coping and liner during deliveries.

    Done when : Delivery, rental and disposal dates are booked, the unloading spot is ready and the locate covers the whole duration of the work.

Phase 3 · Excavation

Layout and excavation

Grades start from the coping: the finished surface meets it at the height given by the pool maker's detail, then falls away. Along the wall, dig by hand and without a machine: the soil against the wall is part of what supports the pool.

  1. 01Lay out the area and set the grades[2, 18, 19, 20, 21, 22]

    Mark the outline with paint. Drive stakes a little outside it and stretch strings at the height of the finished paver surface.

    • Give the strings the planned slope, away from the house and never toward it: at least 1.5% per Techo-Bloc, 2% per Permacon.
    • Widen the painted outline by the extra base width on every free side: the base extends past the edge restraint by at least its own thickness (see "Your project").
    • A rented laser level makes this step much easier on a large area.

    Take levels from the top of the coping and slope the surface toward the outside of the surround.

    Done when : The strings are set at finished height, the level or laser confirms the planned slope along the whole length, and the painted outline includes the extra base width.

  2. 02Dig to the right depth[2, 5, 11, 17, 20, 21, 22, 23]

    First remove the sod and topsoil and set them aside: they will finish the edges later. Then dig to the excavation depth shown in "Your project", which adds up the paver, bedding and base thicknesses, over the full width of the base.

    • The bottom follows the same slope as the finished surface: measure the depth under the strings at regular intervals.
    • Do not disturb the soil below the bottom; if it was disturbed, compact it again.
    • Near locate marks, dig by hand.
    • Load spoil straight into the truck or container when you can.

    A 1.7 t mini excavator fits most yards. With narrow access, you dig by shovel and wheel the soil out, which can roughly double the work time.

    Along the pool wall, dig by hand and keep the machine away from the edge. Do not remove more backfill against the wall than the maker's detail allows.

    Done when : Under the strings, the measured depth matches the planned excavation depth everywhere, the bottom follows the surface slope, and no loose soil or roots remain.

    Safety : Keep the machine at least 1 m from locate marks and away from the pool edge. Never leave an excavation open without an enclosure around the pool.

Phase 4 · Base

Base

A surround's base follows the patio row of the table, with careful drainage. The backfill around an in-ground pool often settles over the years: compact it carefully in thin lifts, and stay cautious against the wall.

  1. 01Prepare the subgrade and lay the geotextile[2, 3, 24]

    Rake the bottom even. If it is sand or gravel, compact it with the plate. On clay or silt, remove soft pockets, do not soak the soil and compact it only if it is dry enough. Techo-Bloc also suggests amending clay with lime and crushed stone before compacting it.

    Then roll out a non-woven geotextile on the bottom and up the sides, with generous overlaps (about 30 cm, estimate), so the fine soil does not rise into the stone. On silt, clay or unknown soil it is required; on sand or gravel it is still useful.

    Done when : No soft spots remain, your footsteps leave no deep prints, and the geotextile covers the bottom and sides with overlaps, without folds or tears.

  2. 02Build the MG-20 base in compacted lifts[2, 3, 5, 20, 21, 22, 25, 26, 27, 28]

    Spread the MG-20 stone in thin lifts and compact each lift before adding the next. Your project's number of lifts is in "Your project".

    • Dampen the stone lightly: too dry, it will not tighten; soaked, it turns unstable.
    • Run the plate in several directions with overlapping passes until it no longer leaves a mark.
    • Keep to the lift thickness the plate can compact: about 100 mm with a 22 kN forward plate per Techo-Bloc. A lighter plate needs thinner lifts; a reversible plate allows thicker ones.
    • Keep the slope on every lift and take care with the last one: the bedding must never be used to correct the base.
    • Montreal targets 95% of modified Proctor on its work. Without a lab test, the practical sign is a surface that no longer moves under the plate or under your heel.

    Near the wall, work in thin lifts with a light plate or a hand tamper, and follow the pool maker's detail; as a precaution, never bring a heavy plate close to the wall or the coping.

    Done when : A 3 m straightedge laid in several directions shows no gap over 10 mm, the slope is right and the plate leaves no more marks.

    Safety : Wear hearing protection, safety glasses and steel-toe boots. Never compact frozen ground and never use frozen stone: wait for a full thaw.

  3. 03Install the edge restraint[2, 19, 20, 21, 22, 25, 29]

    Install an edge restraint on every side that does not bear against the house, a step or existing paving.

    • Plastic or aluminium edging sits on the compacted base, never on soil, and is anchored with spikes driven into the stone.
    • On a straight side it is often installed before the bedding, following the string; along a curve or a cut edge it goes in after cutting. Follow the product's instructions.
    • A 45 degree concrete haunch, reinforced where traffic is heavy, is sturdier than plastic edging.
    • Timber is not an acceptable edge restraint.

    The side against the coping gets no edging if the maker's detail has the coping restrain the pavers. Install edging along the whole outer perimeter.

    Done when : The edging is continuous, lined up with the string, sitting on compacted stone rather than soil, and every spike is fully driven.

    Safety : Wear safety glasses when driving spikes.

Phase 5 · Install and finish

Laying and finishing

Laying starts at the coping and moves outward. The pool's curves need many cuts, and the pool water must stay protected from dust, cutting slurry and sand. Nothing reopens before the enclosure check.

  1. 01Spread and screed the bedding[2, 3, 20, 21, 22, 29, 30]

    Lay two pipes of 1 in outside diameter on the base as rails. Pour concrete sand between them and pull it level with a straightedge, following the slope.

    • The bed stays loose: nobody walks on it and it is not compacted before laying.
    • Screed only the area you will pave today; cover the rest if rain is coming.
    • Pull the rails and fill their grooves with sand using a trowel.
    • If the base has a low spot, fix the base: the sand is not for corrections.
    • Do not use stone dust as bedding: it holds water.

    Done when : The bed is uniform, about 25 mm thick, with no footprints or dips, and the rail grooves are filled.

  2. 02Lay the pavers[2, 3, 20, 21, 22, 31, 32]

    Start from a square corner or along a fixed line, then lay the pavers by hand, tight together, moving forward on the laid pavers rather than on the bed.

    • Pull from several pallets at once, top to bottom, to blend colours.
    • Check joint alignment with a string regularly; Montreal asks for it every 4 to 5 m on its work.
    • Along a house foundation, a step or a slab founded below frost, leave an isolation joint through the full paver thickness so frost does not lock the paving.
    • Pavers drop about 10 mm when compacted: allow for it where they meet lawn, thresholds and drains.

    Start along the coping and work outward. Choose a textured surface and ask the maker whether the product suits a pool surround, especially for a salt-water pool.

    Done when : The whole planned area is covered with full units, joint lines are straight to the string and isolation joints are in place along fixed elements.

    Safety : Lift with your legs, back straight, and wear knee pads and gloves. A pallet of pavers is heavy: do not move it by hand.

  3. 03Cut the edge pavers[3, 20, 21, 22, 25]

    Mark the cuts with a pencil along the string or the curve, then cut with a diamond saw or a guillotine.

    • Cut wet or with a vacuum attachment to limit dust.
    • Avoid small pieces: a cut piece keeps at least one full original side. Shift the pattern instead so you finish with larger pieces.

    Cut away from the pool, with the pool covered, so dust and cutting slurry do not fall into the water. The coping's curves multiply the cuts; "Your project" accounts for them.

    Done when : Every edge is closed with well-fitted pieces, without chips or slivers, and the edge restraint touches the pavers everywhere.

    Safety : Dry-cutting concrete releases fine dust that harms the lungs: cut wet or with a vacuum and wear a well-fitted mask, safety glasses, hearing protection and gloves. Hold the saw with both hands, feet clear of the blade's path.

  4. 04Compact the pavers and fill the joints[2, 3, 20, 21, 22, 28, 29]

    Pick a dry day with no rain forecast for the period stated on the polymeric sand bag.

    1. Run the plate fitted with a urethane protective pad at least twice over the whole surface to seat the pavers in the bed. Stay clear of edges that are not yet restrained.
    2. On fully dry pavers and joints, sweep the polymeric sand into the joints.
    3. Compact again in several passes in different directions, topping up the joints with the broom.
    4. Remove all excess from the surface with the broom, then the blower. A stray grain leaves a stain once wet.
    5. Wet the surface exactly as directed on the bag.

    Do not run the plate over the coping. Sweep the polymeric sand outward, never toward the water, and blow the excess away from the pool before wetting.

    Done when : The joints are full, no paver moves underfoot, the surface is clean before wetting, and the height difference between neighbouring pavers is no more than about 2 to 3 mm.

    Safety : Hearing protection and steel-toe boots for the plate. Polymeric sand is dusty: wear a mask while sweeping it.

  5. 05Check the enclosure before anyone swims[4]

    Before removing the temporary fence and reopening the pool:

    • Measure the enclosure height from the new surface: paving that is higher than the old ground reduces the effective height.
    • Check that no gap under the enclosure or between its parts lets a 10 cm sphere through.
    • Open each gate at different angles and let go: it must close and latch by itself every time.
    • Make sure no new fixed element (low wall, bench, planter, equipment) sits within 1 m of the pool wall or enclosure.

    Done when : The enclosure is at least 1.2 m high from the finished surface everywhere, no opening exceeds 10 cm, every gate closes and latches by itself, and the temporary fence is gone.

  6. 06Finish the edges, clean up and inspect[2, 20, 21, 22, 29]

    Put the topsoil and sod back along the edges to hide and protect the edging. Pick up offcuts, spikes and packaging; return deposit pallets if any.

    Inspect the work after wetting it: water must run off without puddling. The finished surface sits slightly above drain grates, never below.

    In the first spring, walk around it: a paver that moved, a joint that emptied or an edge that is opening is easier to fix early.

    Rinse the paving with the water running away from the pool, then check the filter and the pool water after the work.

    Done when : After wetting, water runs off without puddles, no unit moves, the edging is covered and the site is clear.

Common mistakes

Heavy compaction against the pool wall[5]

What happens

The vibration and pressure of a heavy plate pass into the backfill that supports the wall. The wall of a vinyl or fiberglass pool can deform, and the coping can crack or shift.

How to avoid it

Follow the pool maker's detail for the zone against the wall: thin lifts, a light plate or a hand tamper, and no machine near the edge.

A slope toward the pool[2, 18]

What happens

Rainwater carries soil, sand and debris into the pool and seeps behind the coping, where it wets the backfill that then freezes against the wall.

How to avoid it

Give a slope of at least 1.5% to 2% running from the coping toward the lawn, a drain or a channel, and mirror it at the bottom of the excavation.

Leaving the enclosure open during the work[4]

What happens

A child can walk unsupervised into an open site around a full pool. The permit holder has a duty to control access, and an owner in breach faces a fine.

How to avoid it

Put up a temporary fence before opening the enclosure and check every evening that the pool is surrounded and the gate latches by itself.

Building a low wall or fixed bench near the enclosure[4, 13]

What happens

A low wall, fixed bench or raised planter that is too close becomes a step for climbing over the enclosure, which makes it non-compliant and ineffective.

How to avoid it

Keep any fixed structure that could be used to climb at least 1 m from the pool wall or enclosure, as the regulation requires.

Raising the ground at the foot of the enclosure[4]

What happens

Paving higher than the old ground reduces the enclosure's effective height, which can drop below the 1.2 m minimum without anyone noticing.

How to avoid it

Measure the enclosure height from the finished surface and adjust the enclosure or the grades before reopening the pool.

Letting polymeric sand or cutting slurry into the pool[2, 3]

What happens

Polymeric sand's binder hardens on contact with water, and cutting dust clouds the water and loads the filter. The coping and liner can stay stained.

How to avoid it

Cover the pool during cutting and jointing, cut away from the water and sweep the excess outward before wetting.

Machine digging over the pool lines[11, 33]

What happens

Pool pipes and cables are often shallow and missing from the Info-Excavation marks. Tearing them out causes leaks, outages and an electrocution risk.

How to avoid it

Find the lines with the installer's plans, dig by hand within 1 m of their route and leave any electrical repair to a CMEQ electrician.

Applying polymeric sand on damp pavers[2, 3]

What happens

The binder activates too early: it sticks to the surface and leaves a haze that is hard to remove, and joints stay hollow or crumbly, letting water and weeds in.

How to avoid it

Wait until pavers, joints and bed are completely dry, sweep off all excess before wetting and pick a period with no rain forecast.

Leaving out the edge restraint[2, 25, 29]

What happens

Without a restraint, the edge pavers creep outward, joints open, sand washes out and the whole surface loses its interlock within one or two seasons.

How to avoid it

Install plastic, aluminium or concrete edging anchored on the base along every free side. Do not use timber.

Bedding the pavers on stone dust[3, 29]

What happens

Stone dust holds water. It saturates, freezes and pumps up through the joints: pavers sink in places and joints get dirty within the first seasons.

How to avoid it

Use clean, coarse concrete sand for the bedding. Stone dust is still common in Quebec, but public specifications refuse it.

When to call a pro or an engineer

  • LocateApplies to the typical project

    Any digging needs an Info-Excavation locate request at least 4 business days before starting, and hand digging within 1 m of the marks.[8, 11]

  • MunicipalityApplies to the typical project

    A surround that touches the enclosure, its gates or access to the pool needs a municipal permit, and the holder must control access during the work.[4]

  • ElectricianApplies to the typical project

    Moving or changing lighting, a receptacle, the bonding or the pump's power supply is electrical work: hire a master electrician who is a CMEQ member. An owner may not do it themselves.[33, 34]

  • ContractorApplies to the typical project

    Before touching the coping or the backfill against the wall, get the pool maker's deck detail or hire a pool installer.[5]

  • Contractor

    Paving over an existing slab needs a sound slab and drainage holes drilled through it. Have a professional assess the slab before choosing this method.[3]

  • Contractor

    A surface higher than the existing ground needs fill compacted in lifts and often a low wall or retaining wall. A wall that holds back soil can fall under the Engineers Act depending on its function, the soil and the loads: see the walls guide and a professional.[35]

  • Engineer

    Paving over a roof, deck or garage adds load to the structure and affects the waterproofing: hire a structural engineer.[2, 19]

  • Contractor

    Below a 1.5% slope, water is likely to pond on the pavers. Have a professional check the drainage, or increase the slope.[2]

  • Contractor

    Permeable paving on silt, clay or unknown soil stores water in the base. If it does not drain before freeze-up, it lifts the paving: have the system designed by a professional.[2]

Rules in Quebec

  • SafetyAll of Quebec

    The residential pool safety regulation requires an enclosure around every pool whose water is 60 cm deep or more. The enclosure is at least 1.2 m high, stops a 10 cm sphere, offers no hold for climbing (chain-link mesh openings of at most 30 mm), and a hedge does not count. Every gate closes and latches automatically, with the latch on the inside at the top of the gate or on the outside at least 1.5 m above ground. Municipalities may be stricter.[4, 13]

    Checked October 10, 2026

  • PermitAll of Quebec

    A municipal permit is required to build, install or replace a pool or to build anything that gives or blocks access to a pool. During the work, the permit holder must take temporary measures to control access.[4]

    Checked October 10, 2026

  • SafetyAll of Quebec

    Pool equipment (pump, filter, heater) is installed more than 1 m from the pool wall or enclosure, except as the regulation provides, and any fixed structure or equipment that could be used to climb is kept at least 1 m away.[4]

    Checked October 10, 2026

  • SafetyAll of Quebec

    Installations existing before 1 November 2010 must comply by 30 September 2027; replacing the pool triggers full compliance. An owner in breach faces a fine of $500 to $700, $700 to $1,000 for a repeat offence. Montreal and Quebec City both remind owners of this deadline.[4, 36, 37]

    Checked October 10, 2026

  • LicenceAll of Quebec

    Pool electrical work (pump, lighting, receptacles, bonding) is reserved to master electricians who are CMEQ members when done for others, and an owner may not do it themselves. The paving itself needs no licence on private land.[33, 34]

    Checked October 10, 2026

  • LocateAll of Quebec

    Before digging, file a free request with Info-Excavation. The RBQ asks contractors to file it at least 4 business days before the work; it is valid until the stated end date, for at most 180 days. The construction safety code requires the employer to locate lines before digging. For an owner doing their own work, the request is strongly recommended even though that duty targets employers, and some municipalities, such as Magog, require it on their land.[8, 12, 38]

    Checked October 10, 2026

  • LicenceAll of Quebec

    Per the RBQ licence guide, landscaping on private land, such as private driveways, low walls and paver landings resting on gravel that are not attached to the building, needs no licence. Owners may do this work at their own home, except electrical and gas work, which always goes to a qualified contractor. If you hire, check in the RBQ register that the contractor's subcategories cover the other parts of the contract, such as excavation or concrete.[34, 39, 40]

    Checked October 10, 2026

  • NeighboursAll of Quebec

    The Civil Code (art. 979) requires lower land to receive the natural flow from higher land, but forbids the owner of the higher land from making the neighbour's situation worse. A new paved surface that concentrates water toward the lot line can therefore make you liable.[7]

    Checked October 10, 2026

Words used

Sources

  1. 1.

    Paver quantity calculator · Roof Observations

    Consulted October 10, 2026Source page

    • 45 degree herringbone, circles and irregular outlines need markedly more extra pavers than running bond (commercial guide, indicative).
  2. 2.

    Guide d'installation, Pavés · Techo-Bloc

    Consulted October 10, 2026Source page

    • The excavation adds up the paver, bedding and base thicknesses and extends past the edge restraint by at least the base thickness. (s. 01C)
    • The base table separates pedestrian and vehicular surfaces and sand or gravel soils from clay or silt soils; the latter need a markedly thicker base, and soils very prone to frost justify advice from a geotechnical professional. (p. 64)
    • The finished surface needs at least a 1.5% slope and the excavation bottom must mirror that slope. (s. 01B)
    • On clay, the soil can be amended with lime and crushed stone before compaction, then a geotextile goes on the bottom and sides. (s. 01D)
  3. 3.

    DTNI-3C, Mise en oeuvre des pavés et des dalles en béton ou en pierre naturelle sur lit de pose granulaire · Ville de Montréal

    Published October 3, 2024Consulted October 10, 2026Source page

    • Isolation joint through the full paver thickness against any fixed element founded below frost. (s. 7.7.5)
    • Montreal specifies a non-woven geotextile to BNQ 7009-210. (s. 6.5.2)
    • Montreal targets 95% of modified Proctor, a water content near optimum, and forbids placing frozen aggregate. (s. 7.4.3, 8.2.2)
    • Bed of 25 mm plus or minus 10 mm of manufactured sand; low spots in the base are not filled with sand. (s. 7.6)
  4. 4.

    Règlement sur la sécurité des piscines résidentielles, RLRQ c. S-3.1.02, r. 1 · Gouvernement du Québec (LégisQuébec)

    Consulted October 10, 2026Source page

    • A pool is an outdoor bathing basin with a water depth of 60 cm or more; spas and hot tubs of 2,000 L or less are excluded. (art. 1)
    • An enclosure surrounds every pool. It stops a 10 cm sphere, is at least 1.2 m high and offers no hold for climbing; chain-link mesh openings are at most 30 mm; a wall that forms part of it has no openings except a window at least 3 m above ground or limited to 10 cm; a hedge is not an enclosure. (art. 3 et 4)
    • The gate has the same features as the enclosure plus a passive device that closes and latches it automatically, mounted on the inside at the top of the gate or on the outside at least 1.5 m above ground. (art. 5)
    • Pool operating equipment sits more than 1 m from the pool wall or enclosure, with exceptions; any fixed structure or equipment that could be used to climb is also kept that far away. (art. 7)
  5. 5.

    Installing a fiberglass pool on sand vs. gravel · River Pools

    Consulted October 10, 2026Source page

    • A fiberglass pool maker specifies the backfill material and method around the shell (fine crushed stone, sand only in saturated lifts); the zone against the wall follows the maker's rules.
  6. 6.

    Guide to Lot Drainage · City of Calgary

    Consulted October 10, 2026Source page

    • Downspouts extend 1.2 to 1.8 m and discharge onto lawn, not onto driveways or walks.
  7. 7.

    Écoulement des eaux (rapports de voisinage) · Gouvernement du Québec

    Consulted October 10, 2026Source page

    • Lower land receives the natural flow; the owner of the higher land may not make the neighbour's situation worse. (C.c.Q. art. 979)
  8. 8.

    Travaux d'excavation · Régie du bâtiment du Québec

    Consulted October 10, 2026Source page

    • Info-Excavation request at least 4 business days before the work, valid until the stated end date and for at most 180 days, free of charge.
  9. 9.

    What to do before you dig (underground lines) · Hydro-Québec

    Consulted October 10, 2026Source page

    • Before digging, go through Info-Excavation; the service is free.
  10. 10.

    Demande de localisation · Info-Excavation

    Consulted October 10, 2026Source page

    • Online locate request form.
  11. 11.

    Fiche technique 34, Protéger les services publics souterrains · APSAM (Association paritaire pour la santé et la sécurité du travail, secteur affaires municipales)

    Consulted October 10, 2026Source page

    • Keep the machine at least 1 m from each side of the marks and expose pipes and cables by hand; any hole dug in the ground counts as digging.
  12. 12.

    Code de sécurité pour les travaux de construction, RLRQ c. S-2.1, r. 4 · Gouvernement du Québec (LégisQuébec)

    Consulted October 10, 2026Source page

    • Before digging, the employer must check for underground pipes and locate them exactly on the ground. (art. 3.15.1)
  13. 13.

    Sécurisez votre piscine · Gouvernement du Québec

    Consulted October 10, 2026Source page

    • Government summary of the enclosure, gate and equipment distance requirements.
  14. 14.

    Service de livraison · Gauvreau Transport

    Consulted October 10, 2026Source page

    • A 10-wheel truck carries up to about 15 tonnes and a 12-wheel truck up to about 19 tonnes.
  15. 15.

    1.7 ton compact excavator, diesel (John Deere 17G) · Simplex

    Consulted October 10, 2026Source page

    • The rental company publishes day, weekend, week and month prices; a weekend costs markedly less than three days.
  16. 16.

    Compaction equipment rental · Lou-Tec

    Consulted October 10, 2026Source page

    • Plate compactors rent by the day, the week or four weeks; a week costs about three rental days.
  17. 17.

    Estimating for Mission Requirements (reproduces FM 5-434 Earthmoving Operations, Table 1-1) · United States Marine Corps, TECOM

    Consulted October 10, 2026Source page

    • Excavated soil takes more volume than in the ground (swell), more for clay than for sand. (tableau 1-1)
  18. 18.

    Guide d'installation 2024 · Permacon

    Consulted October 10, 2026Source page

    • Another Quebec maker asks for at least a 2% slope, 1% only when overall drainage is well controlled.
  19. 19.

    Coupe de fondation granulaire pour pavés de porcelaine (fichier installation-guide-celtik-step) · Permacon

    Consulted October 10, 2026Source page

    • The typical section extends the base 150 to 200 mm past the edge.
    • Edge spikes go 150 to 200 mm into the base.
    • Vehicular uses of porcelain pavers require an engineer.
  20. 20.

    Installation de pavé uni au Québec : guide complet des prix au m² et pi² · Soumission Rénovation

    Consulted October 10, 2026Source page

    • Installed paver prices in Quebec; combined with the published labour share and billed hourly rate, they give an all-in band of about 0.08 to 0.25 person-hours per ft² for a patio. Our task rates split that band (derivation, estimate).
  21. 21.

    Experience curve effects · Wikipedia

    Consulted October 10, 2026Source page

    • Published progress ratios range from 0.75 to 0.90. At 0.85, a beginner takes about 2.65 times and an intermediate DIYer about 1.92 times the hours of an experienced crew (model, estimate).
  22. 22.

    Unit pricing in landscaping: how it hurts your profits · Granum (LMN)

    Published September 22, 2025Consulted October 10, 2026Source page

    • Uses 0.15 hours per ft² as an illustrative average, close to the middle of the band derived for a patio.
  23. 23.

    Guide des prix d'excavation : tout ce qu'il faut savoir · Soumission Rénovation

    Published May 7, 2026Consulted October 10, 2026Source page

    • A mini excavator digs a typical 100 linear ft trench in 4 to 6 machine hours, about 1.8 to 2.7 bank m³ per hour for a 1.5 to 1.7 t machine (conversion). Narrow access can roughly double the work time.
  24. 24.

    Natural Stone Installation Guide · Unilock

    Consulted October 10, 2026Source page

    • One maker recommends removing heavy clay to at least 150 mm (search summary).
  25. 25.

    Basic Tech Guide / Project Planning Guide · Unilock

    Consulted October 10, 2026Source page

    • Lifts of 50 to 75 mm compacted with a plate. (s. 3)
    • The guide gives a base thickness range specific to pool decks, with careful drainage.
    • The edging is anchored on the base, which extends past the pavers. (s. 8)
    • Cutting with a guillotine or a wet or vacuum diamond saw. (s. 6)
  26. 26.

    BNQ 2560-114, Granulats · Bureau de normalisation du Québec

    Consulted October 10, 2026Paid standard: cited, never reproducedSource page

    • The MG-20 class and its gradation envelope are defined by BNQ 2560-114 (paid standard, cited only).
  27. 27.

    Crushed stone (products and tonnage calculator) · Groupe Bellemare

    Consulted October 10, 2026Source page

    • Compacted MG-20 is denser than loose delivered MG-20, so it is ordered by the tonne using the compacted density plus a small loss.
  28. 28.

    VP single direction vibratory plates, technical data · Wacker Neuson Canada

    Consulted October 10, 2026Source page

    • A 93 kg forward plate is rated at 750 m² per hour for one pass (theoretical). At four passes and 50% efficiency that is about 94 m² per hour per lift (derivation).
  29. 29.

    TS 3.80, Construction Specification for Concrete Unit Pavers · City of Toronto

    Consulted October 10, 2026Source page

    • Timber is not accepted as an edge restraint. (s. 05.10)
    • Screenings and stone dust are prohibited as bedding, and the bed is not compacted before laying. (s. 3.80.05.04, 07.03)
    • At least four passes while sweeping sand into the joints. (s. 07.05)
    • The finished surface ends 3 to 10 mm above drain inlets and collars. (s. 08.01)
  30. 30.

    Comment installer du pavé uni · Soumission Rénovation

    Published April 17, 2026Consulted October 10, 2026Source page

    • Screeding the bedding needs a second person.
  31. 31.

    Installation guide, Walls and design charts · Techo-Bloc (hosted by dealer Stonewood Products)

    Consulted October 10, 2026Source page

    • Pavers settle about 10 mm into the bedding when compacted. (p. 216)
  32. 32.

    How to install a durable paver driveway · Unilock (contractor site)

    Consulted October 10, 2026Source page

    • At least three plate passes per lift for a driveway, and pavers set about 10 mm high for settlement (search summary).
  33. 33.

    Loi sur les maîtres électriciens, RLRQ c. M-3 · Gouvernement du Québec (LégisQuébec)

    Consulted October 10, 2026Source page

    • Anyone who does electrical installation work for others, lighting included, must be a master electrician and member of the CMEQ. (art. 1 et 21)
  34. 34.

    Travaux que vous pouvez faire vous-même · Régie du bâtiment du Québec

    Consulted October 10, 2026Source page

    • An owner may not do electrical work themselves: it always goes to a qualified contractor.
    • An owner may do their own work, except electrical, gas and petroleum work.
  35. 35.

    Les murs de soutènement · Ordre des ingénieurs du Québec

    Consulted October 10, 2026Source page

    • Per the OIQ, height alone does not decide: a wall holding back soil falls under the Engineers Act if its design needs a study of its materials, depending on its function, the soil and loads above and below.
  36. 36.

    Piscines résidentielles : jusqu'au 30 septembre 2027 pour se conformer · Ville de Montréal

    Consulted October 10, 2026Source page

    • Montreal explains the 2027 compliance deadline (search summary).
  37. 37.

    Mise aux normes des piscines existantes · Ville de Québec

    Consulted October 10, 2026Source page

    • Quebec City reminds owners of the 30 September 2027 deadline for existing pools (search summary).
  38. 38.

    Demande de localisation Info-Excavation · Ville de Magog

    Consulted October 10, 2026Source page

    • Magog makes the request mandatory for work on municipal land (search summary).
  39. 39.

    Guide pour déterminer le besoin d'une licence et la sous-catégorie pertinente : sous-catégorie 2.7, Entrepreneur en travaux d'emplacement · Régie du bâtiment du Québec

    Consulted October 10, 2026Source page

    • Lists the work on private land that needs no licence, including private driveways, low walls and paver landings on gravel. (sous-catégorie 2.7)
  40. 40.

    Vérifier la licence d'un entrepreneur · Régie du bâtiment du Québec

    Consulted October 10, 2026Source page

    • Check the licence in the register before signing and make sure the subcategories match the work.

Review and history

Status
Draft awaiting review
Last reviewed
October 10, 2026
Next review due
April 10, 2027
Reviewers
No qualified reviewer yet
Change log
  1. October 10, 2026

    First version, draft awaiting review by an experienced installer.