Skip to content
paysagement
Guide · Retaining wall

Building a block garden wall or retaining wall

A block wall stands on three hidden parts: a buried course, a dead-level pad of compacted stone and a clear stone drainage zone with a drain that has an outlet. The steps follow those manufacturers publish, and the guide says when height, the load above or the soil call for an engineer and a permit.
Level : IntermediateDraftReviewed October 10, 2026Next review: April 10, 202722 sources
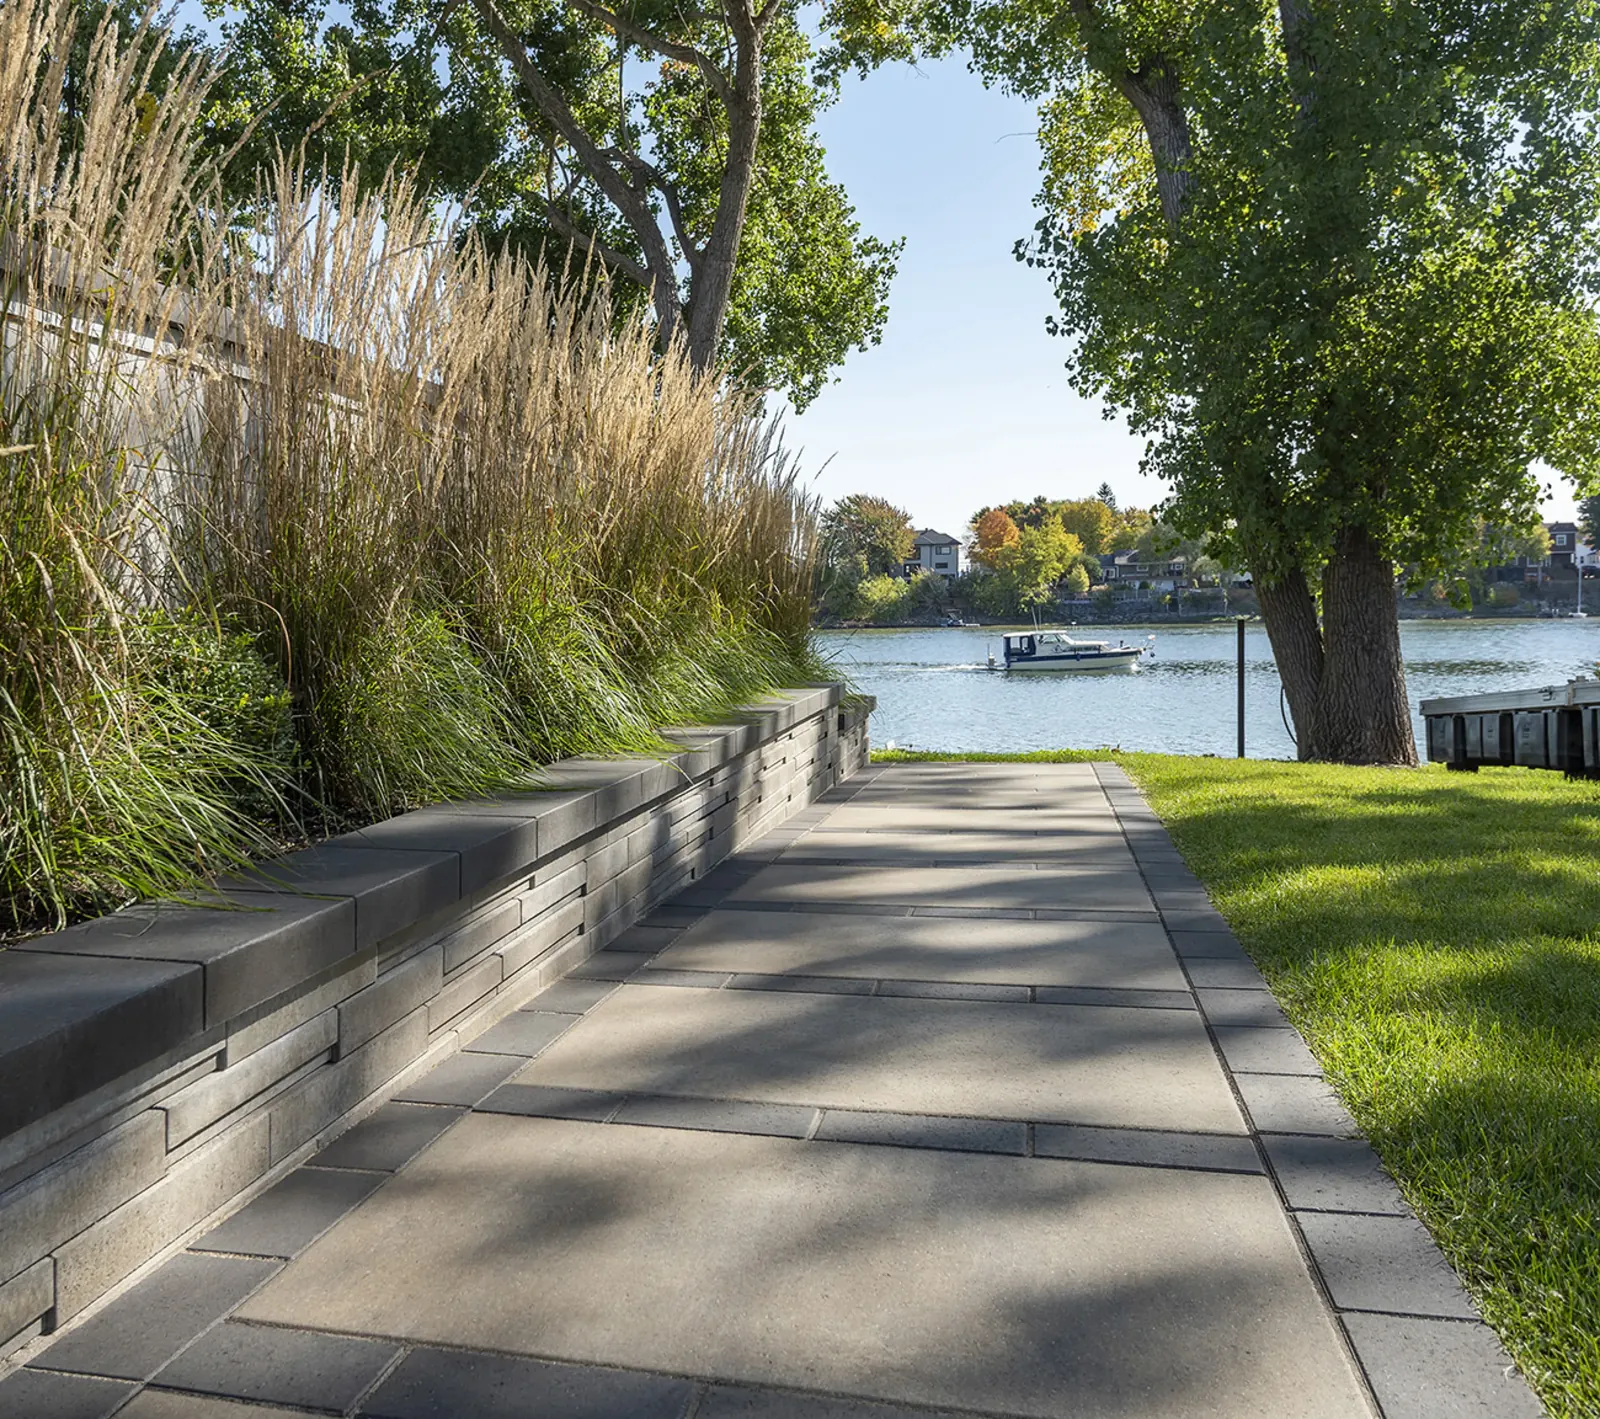
Solino wall in Oka beige with Solino truffle coping along a waterside walkway
Photo: Rinox
Draft.This guide is a draft. It has not yet been reviewed by an experienced installer or an engineer. Quantities and times come from the engine; the text may still change.
In this guide

Your project

The guide's typical project: 10 m (33 ft) long, 600 mm (23.6 in) exposed height. The quantities below come from the calculator and drive every time in this guide.
MaterialQuantity
MG-20 (0-20 mm crushed stone)2.39 t
Non-woven geotextile24 m² (258.1 sq ft)
Wall blocks (face area)9.3 m² (99.8 sq ft)
20 mm clear stone4.62 t
100 mm perforated drain with sock13.5 m (44.3 ft)
Wall caps23 pieces
Concrete adhesive (825 ml cartridges)2 cartridges
Computed for: Quebec (province)
Estimated total working time
Beginner
122 person-h81 to 200 person-h
Intermediate
84 person-h62 to 122 person-h

The total and each step's time come from the same calculation as the estimator: the steps plus machine learning add up to the total. Planning steps (locate request, permits) keep the guide's fixed time.

Phase 1 · Assessment

Assess the wall before you order

A bed-edge garden wall and a wall that holds back a slope are not the same structure. Before anything else, note the visible height, what will sit above the wall and the soil behind it.

  • Every block has a maximum unreinforced height, published by the manufacturer for granular soil with no load or slope above and good drainage. Beyond it, you need geogrid designed by an engineer.
  • Where no local bylaw sets a threshold, CMHA recommends an engineered wall once the total height exceeds 1.2 m. Total height includes the buried course and the cap.
  • The Ordre des ingénieurs du Québec points out that height alone never decides: a load above, a slope, clay or silt soil, water or tiered walls can require an engineer even for a low wall.
  1. 01Measure the height and note the loads[1, 2, 3, 4]

    1. Stretch a level string between the top and the bottom of the future wall and measure the visible height at its tallest point.
    2. Note what will sit above the wall within a distance equal to or less than its height: lawn and people only, or a driveway, parking, a pool, a building, a slope.
    3. Note the soil behind the future wall: sand and gravel, silt, clay or unknown fill. For a test hole, wait for the locate marks (phase 2).
    4. Look for water: a spring, a ditch, a stream, an area that stays wet after rain.
    5. Note whether the wall will be tiered and how far apart the tiers are.
    6. Compare the planned total height with the manufacturer's chart for the chosen block, vertical or inclined.

    Done when : You have written down the visible height, the planned total height, the load above, the soil, any water and any tiers, and you know which of this guide's engineer triggers applies, if any.

  2. 02Choose the block and read its height chart[1, 4]

    1. Choose the block and note its height, depth, setback per course and whether it is laid vertical or inclined.
    2. Find the manufacturer's unreinforced height chart for that block. Those heights include the buried course and apply only to granular soil, with no load or slope above the wall and good drainage.
    3. Compare the total height the calculator gives (visible courses, buried course and cap) with the chart, in the vertical or inclined column that matches your layout.
    4. If the manufacturer publishes no chart, the calculator uses a cautious value by analogy with similar blocks and flags it as an estimate.
    5. Choose the cap that goes with the block.

    Done when : You know the published unreinforced height for your block and layout, and your wall's total height is below it; otherwise, an engineer is planned.

Phase 2 · Permits and locates

Permits, engineer and locates

Wall rules come from your municipality, and in Montreal from your borough. A few examples: Laval requires a certificate of authorization to add or modify a retaining wall, and plans signed and sealed by an engineer from 1.8 m. Gatineau requires a certificate and, at 1.8 m and more measured from the low side, a design approved by an engineer and a guard. Quebec City limits walls to 1 m in front yards and 2 m in side and rear yards unless an engineer seals the plan. Terrebonne treats any wall of 1 m or more as a retaining wall and asks for an engineer's attestation and a surveyor's survey. How height is measured differs between cities: ask.

For a low garden wall or landscaping on private residential land, the RBQ says no licence is required. Before you dig, file your locate request with Info-Excavation.

  1. 01Check your municipality's rules[4, 5, 6, 7, 8, 9]

    1. Look for your municipality's retaining wall or garden wall information sheet, or call the planning department.
    2. Ask: is a permit or certificate needed? From what height is an engineer required, and how is height measured? What distance must be kept from the lot line, a fire hydrant, another wall? Which materials are allowed?
    3. Gather the requested documents: certificate of location, site plan, wall cross-section.
    4. If an engineer trigger applies, hire the engineer before ordering blocks: the design can change the block, the geogrid and the drainage.
    5. Keep the answer in writing.

    Done when : You have a written answer from the municipality (email, information sheet or permit) on the permit, the height threshold and the documents, and, if a trigger applies, an engineer is hired.

  2. 02File the locate request[4, 10, 11]

    1. File the request with Info-Excavation at least 4 business days before you dig. It is free.
    2. Describe the exact work area, including where spoil will go and how the machine gets in.
    3. Write down the request number and its end date: the request is valid until that date, 180 days at most.
    4. Wait for marks or clearances from every network owner notified before you dig.
    5. Protect the marks until the work is done.

    Done when : You have a valid request number and marks or clearances from every owner notified, before the first shovelful.

    Safety : Wires and pipes that you or a previous owner installed (garage, spa, lighting, irrigation) are not marked: find them yourself.

  3. 03Order the materials and plan the delivery[4, 12]

    1. Order the blocks, caps, adhesive, MG-20, clear stone, geotextile and drain from the calculator's quantities, rounded to selling units (pallets, tonnes, rolls).
    2. Pick the drop spot: firm ground, close to the wall, clear of the locate marks and away from fragile edging or pavers.
    3. Check that the truck can get there: a 10-wheel truck needs about 11 ft of width, with no low wires or steep slope.
    4. On delivery, count the pallets and check the block colour and lot before signing the slip.

    Done when : The materials are delivered where planned, counted and as ordered.

Phase 3 · Excavation

Lay out and dig the trench

From front to back, the trench holds 150 mm of clearance in front of the block, the block depth, then 300 mm of clear stone for drainage. Its depth equals the pad thickness plus the buried course or courses. The calculator gives the width, depth and volume for your wall. If the wall is cut into a slope, the back must also be cleared over the full height.

  1. 01Lay out the wall and its height marks[1, 4, 13]

    1. Drive stakes at both ends and stretch a string at the front face of the wall. For a curve, lay a garden hose and mark it with paint.
    2. Mark the trench width the calculator gives behind the string.
    3. Set a height reference (levelled stake or laser) for the top of the pad and for finished grade at the toe.
    4. Check that the layout stays outside the 1 m strip around the locate marks, or plan to dig there by hand.

    Done when : The wall face, the trench width and the height marks are on the ground and checked with a tape.

    Safety : Never look into the rotating laser beam or aim it at anyone's eyes. Set the tripod on firm ground, out of the way of traffic.

  2. 02Dig the trench[1, 4, 13, 14, 15, 16]

    1. Strip the sod and topsoil and set them aside for finishing.
    2. Dig to the width and depth the calculator gives. Remove soft clay, wet or disturbed soil at the bottom and replace it with MG-20 compacted in lifts of 200 mm or less.
    3. On a slope, dig in steps one block high, starting from the lowest.
    4. Within 1 m of the locate marks, dig by hand.
    5. Keep spoil at least 1.2 m from the edge and have it hauled away or reused as planned.

    Done when : The trench bottom is firm, clean and at the planned depth along its full length, checked with a string or laser at several points.

    Safety : No machine within 1 m of the marks. If a trench is deeper than 1.2 m and someone has to go in, shore it or slope the walls back. Nobody stands within the bucket's swing.

Phase 4 · Base

Place the geotextile and the leveling pad

The pad is the wall's foundation: MG-20 compacted to at least 150 mm, dead level. Geotextile lines the bottom and back of the trench so the soil cannot clog the drainage stone; it gets folded over the stone at the end.

  1. 01Compact a level pad[1, 4, 14, 17, 18, 19]

    1. Roll the geotextile along the trench bottom and up the back wall, leaving enough to fold over the clear stone later.
    2. Spread MG-20 in thin lifts and compact each lift with a plate compactor or a rammer, at least two passes per lift.
    3. Lightly wet the stone if it is dry and dusty: it compacts better near its ideal moisture.
    4. Screed the last lift with a straight board and check with a level, lengthwise and crosswise.
    5. On a slope, build each pad step exactly one block higher than the last.

    Done when : The level's bubble stays centred everywhere, lengthwise and crosswise, and the surface no longer marks under the plate or under a heel.

    Safety : Hearing protection and steel-toe boots with the plate. Do not lift a rented plate alone: use a ramp or two people.

Phase 5 · Install and finish

Build, drain and cap the wall

The wall goes up course by course, and the drainage goes up with it: each course gets clear stone in its cores and behind, then compacted backfill behind the drainage zone. The perforated drain sits on the pad behind the first course and must exit to daylight or to the storm system where allowed. If an engineer designed the wall with geogrid, follow the plan exactly: the calculator's geogrid quantities are for budgeting only.

  1. 01Lay the courses, the drain and the drainage stone[1, 2, 4, 17, 19]

    1. First course: blocks of the same height, in full contact with the pad, faces touching, level both ways. This course will be buried.
    2. Drain: lay the perforated drain behind the first course, on the pad, falling toward its outlet. Plan an outlet at least every 15 m and at every low point.
    3. Fill the cores, the gaps between blocks and a band at least 300 mm wide behind with 20 mm clear stone.
    4. Behind the clear stone, backfill in lifts of 200 mm or less and compact each lift. Keep heavy machines more than 1 m from the back of the blocks.
    5. Next courses: sweep the top of the course, set connectors if the system has them, stagger the joints and keep the manufacturer's setback. Backfill every course or every second course.
    6. If the engineer's plan calls for geogrid, stop at each layer elevation and do the next step before carrying on.

    Done when : Every course is level, the joints are staggered, clear stone fills the cores and the back zone up to the course laid, and a bucket of water poured into the high end of the drain comes out at the outlet.

    Safety : Blocks are heavy: lift with your legs, two people for large units, with gloves and safety boots. When cutting, wear glasses, hearing protection and a dust mask.

  2. 02Place the geogrid per the engineer's plan[1, 2, 4]

    This step applies only if an engineer designed the wall with geogrid. The calculator's quantities are for budgeting only: the plan decides.

    1. At each layer elevation shown on the plan, compact the stone and backfill up to the top of the course.
    2. Cut the geogrid to the plan length, measured from the wall face, with no splice in the strong direction.
    3. Lay it flat on the course and the compacted backfill, strong direction perpendicular to the wall.
    4. Pull it taut toward the back and stake it before backfilling.
    5. At an inside corner, run it past the corner by at least a quarter of the wall height; where two layers cross, separate them with about 75 mm of backfill; on a curve, cover the whole area with extra pieces.
    6. Backfill over it without driving directly on the grid.

    Done when : Each layer is at the plan elevation and length, taut, staked, with no splice in the strong direction, and photographed before it is covered.

  3. 03Glue the caps and close the top[1, 4, 19]

    1. Clean and dry the top of the last course.
    2. Glue the last course to the one below, then each cap, with concrete adhesive applied as the product sheet says. Leave no gaps between caps; cut the pieces for curves and corners.
    3. Fold the geotextile over the top of the clear stone.
    4. Cover with a layer of low-permeability soil then topsoil, sloped to shed water away from the wall, so surface water does not flood the drainage zone.
    5. Let the adhesive set before backfilling against the caps or walking on them.

    Done when : After the set time, no cap moves when pushed by hand, the geotextile is folded over and the surface soil sheds water away from the wall.

    Safety : Cut caps with the cut-off saw wearing glasses, hearing protection and a dust mask, and wet the cut to limit silica dust. Wear gloves for the adhesive.

  4. 04Clean up and check the wall[2, 4]

    1. Pick up block offcuts, packaging and surplus; sort them for the drop-off depot or the container.
    2. Sweep the face and top of the wall and rinse off cutting dust.
    3. Check the wall with a string and a level: no block should have moved during backfilling.
    4. After the first heavy rains, check that the drain flows at its outlet and that surface water does not run over the wall.
    5. Keep the photos of the pad, drain, clear stone and geogrid taken before backfilling.

    Done when : The site is clean, the wall is straight to the string and the drain flows at its outlet after rain.

Common mistakes

Setting the first course on the lawn, with no buried course[1, 14]

What happens

The toe slides or gets undermined, and the wall leans forward after one or two winters.

How to avoid it

Bury at least the greater of 150 mm and 10% of the height, more if the ground slopes away in front of the wall.

A pad that is not level[1]

What happens

The error multiplies with every course: open joints, rocking blocks, a stepped cap line.

How to avoid it

Compact the pad in thin lifts and check it with a level, lengthwise and crosswise, before setting the first block.

Backfilling with site soil or clay[1, 2]

What happens

Water stays behind the wall, pushes and freezes: the wall bulges, opens at the joints or tips.

How to avoid it

Keep at least 300 mm of clear stone behind the blocks and in the cores, separated from the soil by geotextile.

A drain that goes nowhere[2]

What happens

The drain fills up and holds water at the toe of the wall, where frost does the most damage.

How to avoid it

Give the drain a fall and an outlet to daylight or to an allowed system, at least every 15 m and at every low point.

Backfilling the full height at once[1]

What happens

Uncompacted backfill settles, leaves hollows behind the wall and lets the wall move.

How to avoid it

Backfill in lifts of 200 mm or less, compacted one by one, as the courses go up.

A heavy machine right against the wall[1]

What happens

Vibration and weight push the blocks forward during construction.

How to avoid it

No heavy machine within 1 m of the back of the blocks; compact that strip with a small plate or a rammer.

Geogrid that is too short, spliced or improvised[1, 2]

What happens

The reinforced soil block is too small to resist the push: the wall can tip as one mass.

How to avoid it

Geogrid comes from an engineer's plan. As a benchmark, CMHA requires a length of at least the greater of 0.6 times the height and 1.2 m.

Caps laid dry[1]

What happens

Caps slide, get pushed or pulled off and let water into the top of the wall.

How to avoid it

Glue the top course and every cap with concrete adhesive and wait for it to set before loading them.

Going above the block's unreinforced height[1]

What happens

The wall leaves the conditions the manufacturer tested and can deform or fail.

How to avoid it

Compare the total height, buried course included, with the manufacturer's chart for your block and conditions; beyond it, have an engineer design the wall.

Tiered walls built too close together[1, 7]

What happens

The upper wall loads the lower one, which was not designed for that weight.

How to avoid it

Space tiers at least twice the lower wall's height apart, or have an engineer design the set. Also respect the municipal distance.

When to call a pro or an engineer

  • Engineer

    At 1 m of visible height or more, have an engineer design the wall. With the buried course, the total height then exceeds CMHA's 1.2 m threshold, and Terrebonne already treats such a wall as a retaining wall that needs an engineer's attestation.[2, 8]

  • Engineer

    In Laval, a wall of 1.8 m or more needs a cross-section signed and sealed by an engineer and a site supervision mandate, on top of the certificate of authorization.[5]

  • Engineer

    In Gatineau, a wall of 1.8 m or more, measured from the low side, must be designed and approved by an OIQ engineer and carry a guard at least 1,070 mm high.[6]

  • Engineer

    In Quebec City, a front-yard wall over 1 m is allowed only with an engineer's sealed plan filed with the certificate application.[7, 20]

  • Engineer

    In Quebec City, a side or rear yard wall over 2 m needs an engineer's sealed plan.[7]

  • Engineer

    In Terrebonne, a wall of 1 m or more is a retaining wall: the certificate requires an engineer's stability attestation and a surveyor's topographic survey.[8]

  • Engineer

    A driveway, parking, a pool or a building above the wall: have an engineer design it, whatever its height.[1, 3]

  • Engineer

    A slope above or below the wall takes it outside the manufacturers' charts: consult an engineer.[1, 3]

  • Engineer

    A wall retaining silt, clay or unknown fill leaves the charts' assumptions (granular soil): have an engineer check the design.[1, 3]

  • Engineer

    A stream, a spring or saturated soil near the wall: consult an engineer, and check municipal rules near shorelines.[3]

  • Engineer

    Tiered walls load each other if they are less than twice the lower wall's height apart: have an engineer design the set.[1, 3]

  • Land surveyor

    Wall near the lot line: confirm the line with your certificate of location or a land surveyor, and keep the municipal setback.[5, 20]

  • MunicipalityApplies to the typical project

    Check whether your municipality requires a permit or certificate: Laval, Gatineau and Saint-Jérôme require one for every retaining wall.[5, 9, 21]

  • LocateApplies to the typical project

    File a free Info-Excavation request at least 4 business days before you dig.[10]

Rules in Quebec

  • LicenceAll of Quebec

    Height alone does not decide whether an engineer is required. According to the Ordre des ingénieurs du Québec, a retaining wall falls under the Engineers Act when its design needs a study of materials, depending on its function, height, soil, erosion or slide risk and loads. Municipal thresholds do not replace the Act.[3]

    Checked October 10, 2026

  • LicenceAll of Quebec

    The RBQ says low walls and landscaping on private land need no licence. For a wall that holds up a driveway, a slope or a building, we recommend hiring a licensed business (subcategory 2.7) and an engineer: the RBQ does not define a height.[22]

    Checked October 10, 2026

  • Permitlaval

    Laval: certificate of authorization to add or modify a retaining wall, with a land surveyor's certificate of location; at 1.8 m and more, a cross-section signed and sealed by an engineer and a supervision mandate. About 30 days.[5]

    Checked October 10, 2026

  • Permitgatineau

    Gatineau: certificate of authorization for a retaining wall (certificate of location and scaled site plan); certificate for a decorative wall over 1.5 m; at 1.8 m and more, measured from the low side, design approved by an OIQ engineer and a guard at least 1,070 mm high.[6, 21]

    Checked October 10, 2026

  • Permitquebec

    Quebec City: maximum height of 1 m in front yards and 2 m in side and rear yards, unless an engineer's sealed plan is filed with a certificate application; at least 1 m between two walls (0.5 m in front yards); at least 0.5 m from the front lot line and 1.5 m from a fire hydrant; list of allowed materials since 2021.[7, 20]

    Checked October 10, 2026

  • Permitterrebonne

    Terrebonne: a wall of 1 m or more is a retaining wall for zoning purposes. The certificate requires an OIQ engineer's attestation of stability and safety and a surveyor's topographic survey; in a landslide zone, a geotechnical study.[8]

    Checked October 10, 2026

  • Permitsaint-jerome

    Saint-Jérôme: free permit for every retaining wall; engineer's attestation above 1.5 m.[9]

    Checked October 10, 2026

  • LocateAll of Quebec

    Before you dig, file a free request with Info-Excavation. The RBQ asks contractors to file at least 4 business days before the work; it is valid until its end date, 180 days at most.[10]

    Checked October 10, 2026

Words used

Sources

  1. 1.

    Installation guide, Walls and design charts · Techo-Bloc (hosted by dealer Stonewood Products)

    Consulted October 10, 2026Source page

    • Techo-Bloc publishes maximum heights without geogrid, embedment included, valid only for granular soil, no surcharge, no slope above and adequate drainage. (p. 159)
    • Techo-Bloc's chart gives, per block, the number of courses and the maximum height without geogrid for inclined and vertical layouts, embedment included; a vertical wall has a lower allowed height. (p. 159)
    • Techo-Bloc sets the trench width at 150 mm in front of the block, plus the block depth, plus 300 mm behind.
    • Techo-Bloc sets the trench width at 150 mm in front of the block, plus the block depth, plus 300 mm behind for drainage stone.
  2. 2.

    SRW-TEC-004-10: Segmental Retaining Wall Design · Concrete Masonry & Hardscapes Association (CMHA, formerly NCMA and ICPI)

    Consulted October 10, 2026Source page

    • CMHA recommends an engineered design above 1.2 m total height where the local code is silent.
    • CMHA calls for at least 300 mm of drainage stone behind the units, a drain of at least 75 mm and outlets at most 15 m apart.
    • CMHA sets the minimum length at the greater of 0.6 H and 1.2 m and a maximum vertical spacing between layers.
    • CMHA requires the wall drain to discharge at outlets.
  3. 3.

    Les murs de soutènement · Ordre des ingénieurs du Québec

    Consulted October 10, 2026Source page

    • The OIQ lists the factors that make an engineer necessary: function, height, soil, erosion or slide risk, load above and loads below the wall.
    • The OIQ counts the load above the wall among the factors that require an engineer; municipal thresholds do not replace the Act.
    • The OIQ counts erosion or slide risk among the factors.
    • The OIQ counts the soil type among the factors.
  4. 4.

    Experience curve effects · Wikipedia

    Consulted October 10, 2026Source page

    • Wright's law links task time to the number of repetitions; published progress ratios range from 0.75 to 0.90.
  5. 5.

    Haie, clôture, muret et mur de soutènement · Ville de Laval

    Consulted October 10, 2026Source page

    • Laval requires a certificate of authorization and, for a wall of 1.8 m or more, a cross-section signed and sealed by an engineer plus a site supervision mandate.
    • Laval requires engineer-signed and sealed plans for a wall of 1.8 m or more.
    • Laval asks for a land surveyor's certificate of location with the application.
    • Laval requires a certificate to add or modify a retaining wall.
  6. 6.

    Règlement de construction numéro 534-2025 · Ville de Gatineau

    Consulted October 10, 2026Source page

    • Gatineau bylaw 534-2025 requires, for a wall of 1.8 m or more measured from the low side, a design approved by an engineer and a guard at least 1,070 mm high.
    • Bylaw 534-2025 sets these requirements at 1.8 m measured from the low side.
    • Construction bylaw 534-2025.
  7. 7.

    Fiche 60 : Mur de soutènement, clôture et talus combinés (juillet 2023) · Ville de Québec

    Consulted October 10, 2026Source page

    • Quebec City limits walls to 1 m in front yards and 2 m in side and rear yards, and asks for at least 1 m between two walls.
    • Quebec City requires at least 1 m between two walls in side and rear yards.
    • Quebec City limits front-yard walls to 1 m.
    • Quebec City limits side and rear yard walls to 2 m.
  8. 8.

    Formulaire de demande de certificat : Mur de soutènement (C-04) · Ville de Terrebonne

    Published January 21, 2026Consulted October 10, 2026Source page

    • Terrebonne asks for an OIQ engineer's attestation of stability and safety and a surveyor's topographic survey for a retaining wall.
    • Terrebonne requires an OIQ engineer's attestation for a retaining wall.
    • Terrebonne's C-04 form sets these documents.
    • Terrebonne form C-04 (updated 2026-01-21).
  9. 9.

    Mur de soutènement · Ville de Saint-Jérôme

    Consulted October 10, 2026Source page

    • Saint-Jérôme requires a free permit for every retaining wall and an engineer's attestation above 1.5 m.
    • Saint-Jérôme requires a free permit for every retaining wall.
    • Saint-Jérôme page on retaining walls.
  10. 10.

    Travaux d'excavation · Régie du bâtiment du Québec

    Consulted October 10, 2026Source page

    • The RBQ asks for the Info-Excavation request at least 4 business days before the work; it is free and valid until its end date, 180 days at most.
    • The RBQ asks for the request at least 4 business days before the work.
    • RBQ page on excavation work.
  11. 11.

    Demande de localisation · Info-Excavation

    Consulted October 10, 2026Source page

    • Info-Excavation takes locate requests online.
  12. 12.

    Service de livraison · Gauvreau Transport

    Consulted October 10, 2026Source page

    • Gauvreau states that a 10-wheel or 12-wheel truck needs about 11 ft of access width and carries up to about 15 t or 19 t.
  13. 13.

    Fiche technique 34, Protéger les services publics souterrains · APSAM (Association paritaire pour la santé et la sécurité du travail, secteur affaires municipales)

    Consulted October 10, 2026Source page

    • APSAM keeps the machine at least 1 m from each side of the marks.
    • APSAM asks to keep the machine at least 1 m on each side of the marks and to expose services by hand.
  14. 14.

    Proper embedment guidelines · Allan Block

    Consulted October 10, 2026Source page

    • Allan Block calls for removing clay, wet or disturbed soil and replacing it with granular material in lifts of 200 mm or less.
    • Allan Block calls for at least two passes of a walk-behind plate on the pad.
    • Allan Block increases embedment when the ground slopes down in front of the toe.
    • Embedment and replacement of soft soils.
  15. 15.

    Code de sécurité pour les travaux de construction, RLRQ c. S-2.1, r. 4 · Gouvernement du Québec (LégisQuébec)

    Consulted October 10, 2026Source page

    • The safety code forbids materials within 1.2 m of a trench edge and requires shoring of the walls, with exceptions. (art. 3.15.3)
  16. 16.

    Guide des prix d'excavation : tout ce qu'il faut savoir · Soumission Rénovation

    Published May 7, 2026Consulted October 10, 2026Source page

    • Soumission Rénovation gives 4 to 6 mini excavator hours for 100 linear feet of trench 2 to 3 feet deep.
  17. 17.

    Basic Tech Guide / Project Planning Guide · Unilock

    Consulted October 10, 2026Source page

    • Unilock also gives 150 mm of compacted base under the first course. (pp. 7 to 8)
    • Unilock fills the cores and the back of the wall with clear stone and staggers joints from course to course. (pp. 7 to 8)
    • Unilock lets the adhesive set 4 to 8 hours before backfilling topsoil; we use the top of the range. (p. 8)
    • Pad, clear stone fill and adhesive set time.
  18. 18.

    DTNI-3C, Mise en oeuvre des pavés et des dalles en béton ou en pierre naturelle sur lit de pose granulaire · Ville de Montréal

    Published October 3, 2024Consulted October 10, 2026Source page

    • The City of Montreal compacts the granular base close to its optimum moisture content.
  19. 19.

    Prix d'installation d'un mur de soutènement par un entrepreneur au Québec · Soumission Rénovation

    Published August 19, 2026Consulted October 10, 2026Source page

    • Soumission Rénovation publishes 35 to 65 $ per ft2 of face for an installed concrete block wall, drainage included; we derive about 0.16 to 0.65 person-hours per ft2 of face all-in to cross-check our rates.
  20. 20.

    R.V.Q. 1400 : Règlement d'harmonisation sur l'urbanisme · Ville de Québec

    Consulted October 10, 2026Source page

    • R.V.Q. 1400 allows exceeding the heights with an engineer's sealed plan (arts. 488, 489.0.1).
    • Quebec City requires at least 0.5 m between a wall and the front lot line (art. 490).
    • R.V.Q. 1400, articles 488 to 490.
  21. 21.

    Mur de soutènement ou muret décoratif (certificat d'autorisation) · Ville de Gatineau

    Consulted October 10, 2026Source page

    • Gatineau requires a certificate of authorization for a retaining wall.
    • Gatineau page on retaining and decorative walls.
  22. 22.

    Guide pour déterminer le besoin d'une licence et la sous-catégorie pertinente : sous-catégorie 2.7, Entrepreneur en travaux d'emplacement · Régie du bâtiment du Québec

    Consulted October 10, 2026Source page

    • The RBQ lists low walls on private land among work needing no licence.

Review and history

Status
Draft awaiting review
Last reviewed
October 10, 2026
Next review due
April 10, 2027
Reviewers
Rédaction paysagement (editor)
Change log
  1. October 10, 2026

    First version, written from manufacturer guides, CMHA, the OIQ and municipal pages. Draft awaiting review by an installer and an engineer.