Skip to content
paysagement
Guide · Steps

Building outdoor block or slab steps

Good outdoor steps all have the same height, a run long enough for the foot and a slight fall so water does not freeze on them. Steps: apply the rise and run rules, with their sources, then build with glued blocks on a compacted base, before the paving around them.
Level : IntermediateDraftReviewed October 10, 2026Next review: April 10, 202720 sources
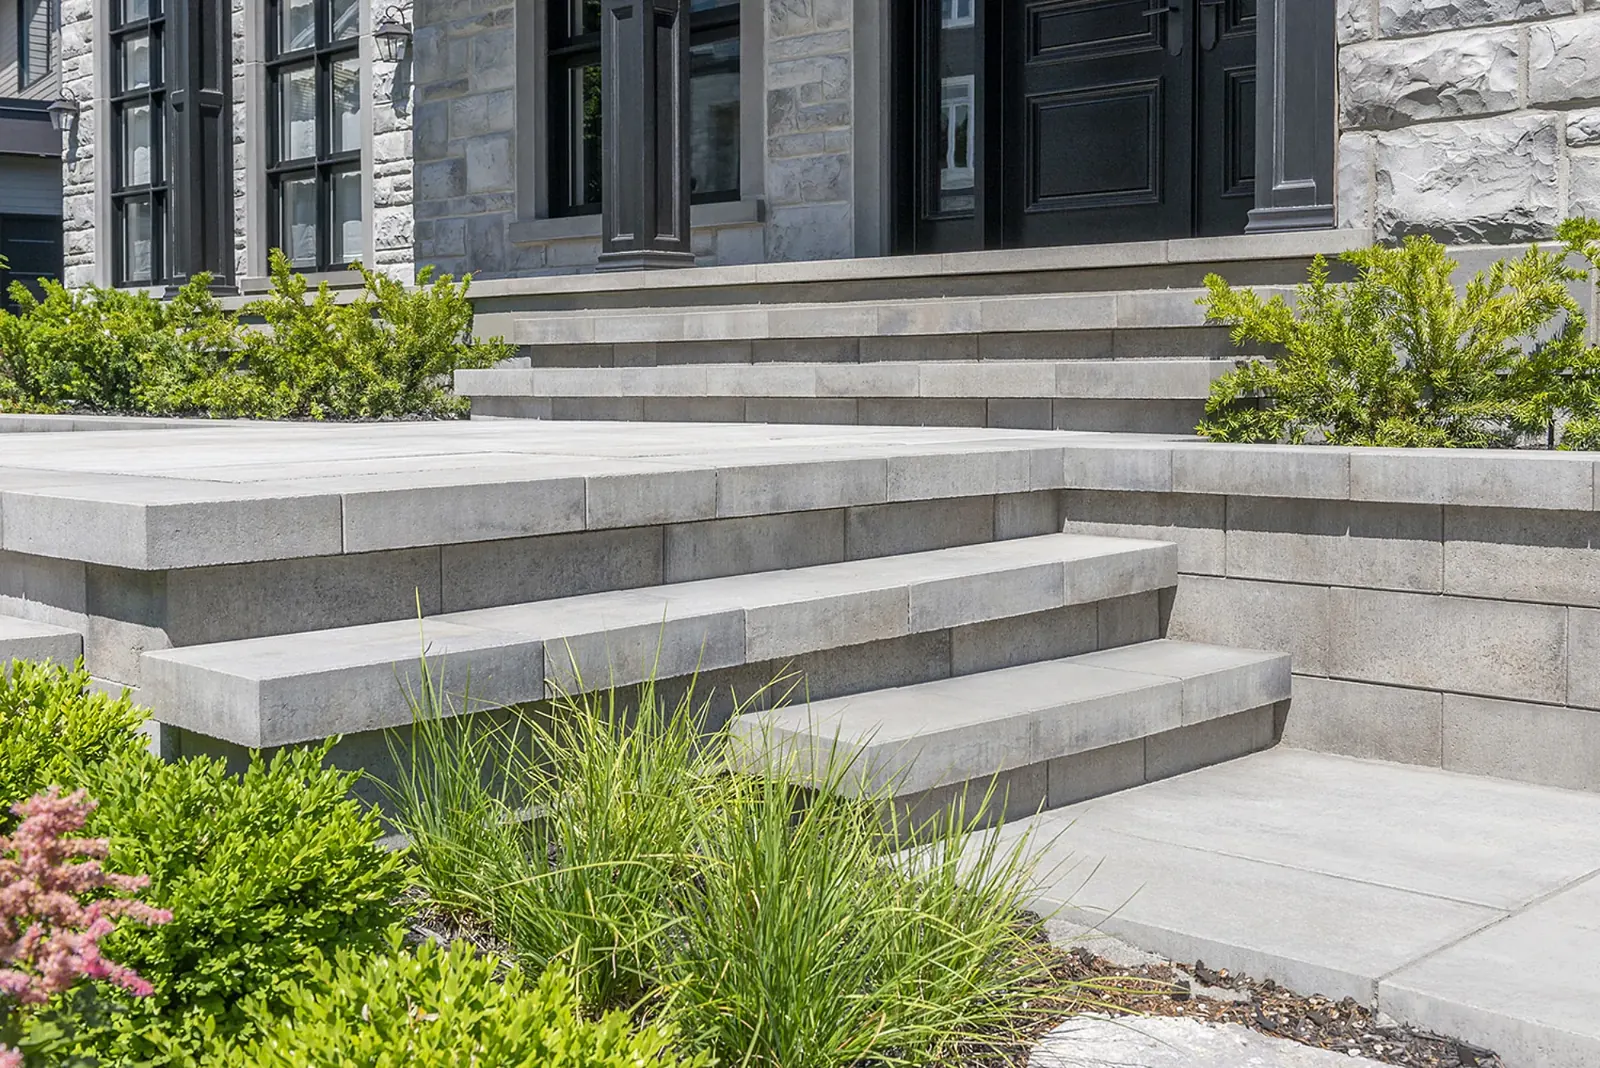
Solino steps in sky grey between two patio levels, with plantings
Photo: Rinox
Draft.This guide is a draft. It has not yet been reviewed by an experienced installer or an engineer. Quantities and times come from the engine; the text may still change.
In this guide

Your project

The guide's typical project: 600 mm (23.6 in) total rise, 1.5 m (5 ft) wide. The quantities below come from the calculator and drive every time in this guide.
MaterialQuantity
MG-20 (0-20 mm crushed stone)720 kg
Riser blocks36 pieces
Tread slabs1.8 m² (19.2 sq ft)
20 mm clear stone (fill)50 kg
Concrete adhesive (825 ml cartridges)1 cartridge
Computed for: Quebec (province)
Estimated total working time
Beginner
42 person-h24 to 85 person-h
Intermediate
29 person-h18 to 52 person-h

The total and each step's time come from the same calculation as the estimator: the steps plus machine learning add up to the total. Planning steps (locate request, permits) keep the guide's fixed time.

Phase 1 · Assessment

Design comfortable, safe steps

Three rules guide the design:

  • Every rise is the same. A step that differs from the others, often the first or the last, trips people.
  • The rise stays between 100 mm (lower, it goes unseen and trips people) and the code limit of 180 mm. Outdoors, a rise of about 150 mm is the most comfortable.
  • Two rises plus one run add up to about one stride, around 650 mm. The run stays between 280 and 425 mm for landscape steps, and at least 255 mm where the code applies.

The calculator starts from the total rise and gives the number of steps, their equal rise, the run and the total length.

  1. 01Measure the total rise and the space available[1, 2, 3, 4]

    1. Set a straight board level on the landing or porch and measure, at the foot of the future last step, the height down to finished grade. That is the total rise.
    2. Measure the horizontal length available in front of the landing and the width you want. Where the code applies, the width is at least 900 mm.
    3. Note whether the top arrives on an existing landing (porch, deck) or at ground level.
    4. Enter these measurements in the calculator and check that the proposed run fits the space. If not, add an intermediate landing or change the layout rather than shortening the run.
    5. Note whether the stair serves the house entrance and whether a side stays open to a drop.

    Done when : You have the total rise to within 5 mm, the available length and width, and the calculator proposes equal steps that meet the rise, run and stride rules in that space.

  2. 02Choose the system and match the blocks to the rise[3, 4, 5]

    1. Choose the system: wall blocks with slab treads, precast monolithic steps, or natural stone slabs.
    2. With blocks, a step's rise equals the number of block courses plus the tread thickness. The calculator picks the number of courses and flags a mismatch if the blocks cannot give the rise you want.
    3. With monolithic steps, check that each piece's height and depth meet the stride rule.
    4. Choose a textured tread surface deep enough to overhang slightly at the front.

    Done when : The calculator gives equal steps with the chosen product, with no flagged mismatch between block height and rise.

Phase 2 · Permits and locates

Rules, licence and locates

Block or slab steps set on gravel and not attached to the house are landscaping: the RBQ says no licence is required to build them. Steps attached to the building or poured on footings touch the building and need a licensed business.

When the stair serves the house entrance, the code rules apply: uniform rises, a minimum run, a handrail beyond three risers and a guard where the walking surface is more than 600 mm above the ground beside it. Your municipality may have its own exceptions. Before you dig, file your Info-Excavation request.

  1. 01Check which rules apply[4, 6, 7, 8]

    1. Decide whether the steps will float (set on gravel, separate from the house) or be attached (resting on or anchored to the porch or foundation). If attached, hire a licensed business.
    2. If the stair serves the entrance, use the code values: equal rises, minimum run, width, handrail and guard.
    3. Ask your municipality whether it changes these rules or requires a permit for your case. Some cities have exceptions, for example for existing exterior stairs.
    4. Plan the handrail or guard now: their anchors go in during construction.

    Done when : You know whether the steps float or are attached, which code rules apply, whether a permit is required, and where any required handrail or guard will go.

  2. 02File the locate request[4, 9, 10]

    1. File the free Info-Excavation request at least 4 business days before you dig, even for a small footprint.
    2. Write down the request number and its end date (180 days at most).
    3. Wait for marks or clearances from every owner notified.

    Done when : You have a valid request number and all marks or clearances before you dig.

  3. 03Order the materials and plan the delivery[4, 11, 12]

    1. Order the blocks, treads, adhesive, MG-20 and clear stone from the calculator's quantities, rounded to selling units.
    2. Pick the drop spot: firm ground, close to the steps, clear of the locate marks.
    3. Check truck access: a 10-wheel truck needs about 11 ft of width.
    4. On delivery, check the colour, lot and condition of the treads before signing.

    Done when : The materials are delivered where planned, counted and with no broken slab.

Phase 3 · Excavation

Dig the footprint

Steps are built before the paving around them, so the adhesive has set when the plate compactor passes close by. Dig the step footprint, a little wider than the blocks, to the base depth plus one buried course of blocks under the first step. The calculator gives the footprint and the volume.

  1. 01Mark the location and the height reference[2, 4]

    1. Centre the steps on the door or on the walkway leading to it.
    2. Mark the footprint with paint, adding a strip of base on each side and in front.
    3. Use the top of the landing as the height reference and carry it with a level or laser to the foot of the steps.
    4. Check with a tape that the marked length matches the length the calculator gives.

    Done when : The footprint is marked on the ground, centred on the door, and the height reference is carried to the foot of the steps.

    Safety : Never look into the rotating laser beam or aim it at anyone's eyes. Set the tripod on firm ground, out of the way of traffic.

  2. 02Dig the footprint[2, 4, 10, 13]

    1. Remove the sod and topsoil and keep them for finishing.
    2. Dig the marked footprint to the depth the calculator gives. Remove soft or organic soil at the bottom.
    3. Near the locate marks, dig by hand and expose the lines until you can see them.
    4. If the steps rest against a slope, also dig out the part of the slope they will occupy.

    Done when : The bottom is flat, firm and at the planned depth over the whole footprint, checked with a level and a tape.

    Safety : Dig by hand within 1 m of the marks. Gloves and safety boots; bend your knees to lift soil.

Phase 4 · Base

Compact the base

The compacted crushed stone base keeps the steps from settling and moving with frost. Unilock gives 100 to 150 mm of compacted gravel under block steps; on clay or silt we plan thicker. The stone is compacted in thin lifts with a plate compactor.

  1. 01Spread and compact the MG-20[4, 14, 15, 16]

    1. Spread MG-20 in lifts of about 100 mm.
    2. Compact each lift with a plate compactor, in several crossing passes, until it no longer marks.
    3. Screed the last lift level at the height planned for the buried course.
    4. Check with a level both ways.

    Done when : The base is level both ways, at the planned height, and no longer marks under a heel or under the plate.

    Safety : Hearing protection and steel-toe boots with the plate compactor.

Phase 5 · Install and finish

Build the steps and set the treads

A block step is a small box: glued blocks for the riser and sides, a compacted clear stone fill and a glued slab tread with a slight overhang. Each step rests on the box of the step below, and the first sits on a buried course. Precast monolithic or natural stone steps go in the same way, one piece per step, on a compacted base.

  1. 01Build the risers, fill and glue the treads[2, 3, 4, 5, 14, 17]

    1. Set the buried course under the first step, level, on the base.
    2. Build the first step's riser and its returns on the open sides. Glue each course with concrete adhesive.
    3. Fill the inside with clear stone and compact it in thin lifts with a rammer or a small plate.
    4. Set the tread on beads of adhesive, with a slight overhang at the front and a slight forward fall so water runs off (about 1 to 2%, our estimate).
    5. Build the next step on the back of the tread below, and so on.
    6. Before gluing each tread, measure the step's rise: they must all be equal.
    7. Let the adhesive set before walking on the steps.

    Done when : Measured with a tape, every rise is equal, with no more than 5 mm between two steps; each tread falls slightly forward; nothing moves underfoot after the set time.

    Safety : Lift slabs with two people. When cutting, wear glasses, hearing protection and a dust mask.

  2. 02Tie in to the paving and finish[4, 14, 18]

    1. If the steps float, keep a separation joint between them and the foundation or porch; do not glue them to the building.
    2. Butt the paving against the bottom step and hold it with an edge restraint.
    3. While compacting the paving, keep the plate away from the steps.
    4. Put the topsoil and sod back on the sides.

    Done when : The paving butts the steps with no gap, no step moved during compaction and a joint separates the steps from the building.

  3. 03Install the required handrail or guard[1, 4, 7, 19]

    1. Check what is required: a handrail beyond three risers at an entrance, a guard where a walking surface is more than 600 mm above the ground beside it.
    2. Fix the handrail at 865 to 1,070 mm, measured above the step nosings, along the full length of the stair.
    3. Anchor the posts in anchors planned during construction, not only in the stone fill.
    4. A guard must resist a person leaning or falling on it: have it designed and installed by a professional.

    Done when : The required handrail or guard is in place, does not move when you lean on it with your full weight and meets the code height.

    Safety : Drilling or cutting concrete: glasses, hearing protection and a dust mask.

Common mistakes

Unequal rises[1]

What happens

The foot expects the same height on every step: one step higher or lower, often the first or the last, trips people.

How to avoid it

Divide the total rise into equal heights with the calculator and measure each step before gluing the tread.

A run that is too short[1, 2]

What happens

The foot does not fit on the step: people go down on their heel or toe, especially in winter.

How to avoid it

Keep the run between 280 and 425 mm, at least 255 mm where the code applies; if space is short, add a landing.

Building the steps after the paving[2]

What happens

The plate compactor runs against steps whose adhesive has not set and moves them.

How to avoid it

Build the steps first and let the adhesive set before compacting the paving around them.

Dead-flat treads[3]

What happens

Water sits on the step and freezes: ice forms there first.

How to avoid it

Give each tread a slight forward fall.

Gluing or pouring steps against the foundation with no footing below frost[18]

What happens

The house does not move but floating steps rise and fall with frost: the joint breaks and the steps crack.

How to avoid it

Either the steps float and stay separated from the building by a joint, or they sit on footings below frost built by a licensed business.

A very low step[2]

What happens

A step under 100 mm goes unnoticed and trips people.

How to avoid it

Replace it with a gentle ramp or regroup the rise to get steps of at least 100 mm.

No buried course under the first step[15]

What happens

The first step slides or sinks and drags the others with it.

How to avoid it

Set a buried course of blocks under the first step, as for a wall.

Forgetting the handrail or the guard[7, 19]

What happens

Risk of falls, especially on ice, and a non-compliant stair at a house entrance.

How to avoid it

Beyond three risers at an entrance, plan a handrail; if the surface is more than 600 mm above the ground beside it, a guard.

When to call a pro or an engineer

  • ContractorApplies to the typical project

    These steps serve the house entrance: the code rules apply (uniform rises, run, width, handrail, guard). Have the plan checked if in doubt.[1, 7]

  • MunicipalityApplies to the typical project

    With about four risers or more at an entrance, a handrail is generally required. Check your municipality's rule.[7]

  • Contractor

    Above about 600 mm of total rise, a walking surface or landing may need a guard, which must be solidly anchored: have it designed or installed by a professional.[19]

  • Contractor

    Steps attached to the building or on concrete footings fall outside the RBQ exemption: hire a business holding the right licence.[6, 20]

  • LocateApplies to the typical project

    File a free Info-Excavation request at least 4 business days before you dig.[9]

Rules in Quebec

  • LicenceAll of Quebec

    Block or paver landings and steps set on gravel that serve an entrance without being attached to the building need no RBQ licence. Attached steps or steps on concrete footings belong to a licensed business (interpretation, to confirm with the RBQ for your case).[6]

    Checked October 10, 2026

  • SafetyAll of Quebec

    For a stair serving a dwelling, the National Building Code 2020 values summarized by CCOHS are: rise 125 to 180 mm, run 255 to 355 mm, width at least 900 mm, handrail 865 to 1,070 mm high, uniform steps. The Quebec Construction Code edition in force remains to be confirmed.[1]

    Checked October 10, 2026

  • SafetyAll of Quebec

    Handrail beyond three risers on a dwelling's exterior stair, and a guard where the walking surface is more than 600 mm above the ground beside it. Municipalities apply these rules their own way: check yours.[7, 19]

    Checked October 10, 2026

  • Permitboucherville

    Boucherville: the construction bylaw allows rises up to 216 mm for certain existing exterior stairs. An example of a local rule that changes the code.[8]

    Checked October 10, 2026

  • LocateAll of Quebec

    Before digging, even a small footprint, file a free Info-Excavation request at least 4 business days ahead.[9]

    Checked October 10, 2026

Words used

Sources

  1. 1.

    Escaliers : prévention contre les chutes · Centre canadien d'hygiène et de sécurité au travail (CCHST)

    Consulted October 10, 2026Source page

    • CCOHS summarizes National Building Code 2020 values: rise 125 to 180 mm, run 255 to 355 mm, width at least 900 mm, uniform steps.
    • CCOHS summarizes the code handrail height: 865 to 1,070 mm.
    • CCOHS calls for uniform steps, within a few millimetres.
    • The code sets a minimum run of 255 mm.
  2. 2.

    Guidance for the construction of domestic steps, V1.0 · Tobermore

    Consulted October 10, 2026Source page

    • Tobermore prefers a 150 mm rise, never under 100 mm, and a 280 to 425 mm tread for landscape steps.
    • Tobermore centres the steps on the door.
    • Tobermore has the steps built before the surrounding paving and centres them on the door.
    • Tobermore slopes treads slightly forward and plans a platform at least 450 mm deep for a single step.
  3. 3.

    CUGE Research Technical Note 02-2009: Steps in the landscape · National Parks Board (Singapore)

    Consulted October 10, 2026Source page

    • NParks applies a stride rule of about 650 mm to landscape steps.
    • NParks asks for treads to fall so water does not pond.
    • NParks asks for a tread fall that prevents ponding.
  4. 4.

    Experience curve effects · Wikipedia

    Consulted October 10, 2026Source page

    • Wright's law links task time to the number of repetitions; published progress ratios range from 0.75 to 0.90.
  5. 5.

    Guide produit : marche Celtik · Permacon

    Consulted October 10, 2026Source page

    • Permacon offers precast steps in step and riser sets, stackable two high.
    • Permacon offers precast steps with anchor rods, stackable two high.
  6. 6.

    Guide pour déterminer le besoin d'une licence et la sous-catégorie pertinente : sous-catégorie 2.7, Entrepreneur en travaux d'emplacement · Régie du bâtiment du Québec

    Consulted October 10, 2026Source page

    • The RBQ exempts block or paver landings on gravel that serve an entrance, are not attached to the building and complete the landscaping.
    • The exemption covers landings set on gravel and not attached to the building.
    • RBQ guide, subcategory 2.7.
    • Licence exemption for unattached landings.
  7. 7.

    Garde-corps et main courante pour votre sécurité · CAA-Québec

    Consulted October 10, 2026Source page

    • CAA-Québec explains when a handrail and a guard are required on an exterior stair.
    • CAA-Québec describes when a handrail and a guard are required.
    • Handrail and guard requirements.
    • CAA-Québec states that a handrail is required beyond three risers.
  8. 8.

    Règlement 2024-293-6 (construction) · Ville de Boucherville

    Consulted October 10, 2026Source page

    • Boucherville amended article 9.8.4.1 to allow up to 216 mm rises on certain existing exterior stairs.
    • Bylaw 2024-293-6.
  9. 9.

    Travaux d'excavation · Régie du bâtiment du Québec

    Consulted October 10, 2026Source page

    • The RBQ asks for the Info-Excavation request at least 4 business days before the work; free, valid 180 days at most.
    • 4 business day lead time asked by the RBQ.
    • RBQ page on excavation work.
  10. 10.

    Fiche technique 34, Protéger les services publics souterrains · APSAM (Association paritaire pour la santé et la sécurité du travail, secteur affaires municipales)

    Consulted October 10, 2026Source page

    • For APSAM, any hole dug in the ground counts as digging, small excavations included.
    • APSAM asks to expose services by hand within 1 m of the marks.
  11. 11.

    Service de livraison · Gauvreau Transport

    Consulted October 10, 2026Source page

    • Gauvreau states that a 10-wheel or 12-wheel truck needs about 11 ft of access width.
  12. 12.

    Crushed stone (products and tonnage calculator) · Groupe Bellemare

    Consulted October 10, 2026Source page

    • Groupe Bellemare's tonnage calculator uses about 2.29 t per m3 of compacted MG-20 and 1.63 t per m3 of loose clear stone: stone is ordered by the tonne.
  13. 13.

    Guide des prix d'excavation : tout ce qu'il faut savoir · Soumission Rénovation

    Published May 7, 2026Consulted October 10, 2026Source page

    • Soumission Rénovation gives 4 to 6 mini excavator hours for 100 linear feet of trench 2 to 3 feet deep, about 1.8 to 2.7 m3 per hour.
  14. 14.

    Basic Tech Guide / Project Planning Guide · Unilock

    Consulted October 10, 2026Source page

    • Unilock gives 100 to 150 mm of gravel base under block steps, and 200 mm of clear stone backfill behind. (p. 7)
    • Unilock builds block steps with a clear stone fill and slab treads. (p. 7)
    • Unilock lets the adhesive set 4 to 8 hours; we use the top of the range. (p. 8)
    • Unilock ties the paving to the steps with an edge restraint.
  15. 15.

    Installation guide, Walls and design charts · Techo-Bloc (hosted by dealer Stonewood Products)

    Consulted October 10, 2026Source page

    • Under a pillar, Techo-Bloc compacts 0-20 mm stone in 100 mm lifts with a 22 kN plate, to 95% Proctor. (p. 216)
    • Wall guides bury at least one course below the first visible course. (section 01C)
  16. 16.

    Installation de pavé uni au Québec : guide complet des prix au m² et pi² · Soumission Rénovation

    Consulted October 10, 2026Source page

    • Soumission Rénovation publishes 18 to 25 $ per ft2 for an installed paver patio; we derive about 0.14 person-hours per ft2 all-in to cross-check base time.
  17. 17.

    Prix d'installation d'un mur de soutènement par un entrepreneur au Québec · Soumission Rénovation

    Published August 19, 2026Consulted October 10, 2026Source page

    • Soumission Rénovation publishes 35 to 65 $ per ft2 of face for an installed concrete block wall; we derive about 0.16 to 0.65 person-hours per ft2 of face, a benchmark for steps built with the same units.
  18. 18.

    DTNI-3C, Mise en oeuvre des pavés et des dalles en béton ou en pierre naturelle sur lit de pose granulaire · Ville de Montréal

    Published October 3, 2024Consulted October 10, 2026Source page

    • Montreal requires an isolation joint through the full paver thickness where paving meets a fixed element founded below frost. (s. 7.7.5)
    • Montreal requires an isolation joint between paving and any fixed element founded below frost. (s. 7.7.5)
  19. 19.

    Présentation : garde-corps (2025) · Municipalité de Roxton Pond

    Consulted October 10, 2026Source page

    • Guard required more than 600 mm above adjacent ground.
    • Roxton Pond requires a guard above 600 mm.
    • 600 mm guard threshold.
  20. 20.

    Vérifier la licence d'un entrepreneur · Régie du bâtiment du Québec

    Consulted October 10, 2026Source page

    • Check the licence and its subcategories in the RBQ register.

Review and history

Status
Draft awaiting review
Last reviewed
October 10, 2026
Next review due
April 10, 2027
Reviewers
Rédaction paysagement (editor)
Change log
  1. October 10, 2026

    First version, written from the CCOHS code summary, the Tobermore and Unilock guides and the RBQ licence guide. Draft awaiting review by an installer.