Skip to content
paysagement
Guide · Irrigation

Automatic sprinkler system: the basics

A good sprinkler system starts with your water supply's pressure and flow, zones that group the same needs and heads that reach each other. Steps: design, the plumber's connection with a backflow preventer, laying the pipe and shutting down before frost. Head and zone counts and lengths come from the calculator.
Level : IntermediateDraftReviewed October 10, 2026Next review: October 10, 202715 sources
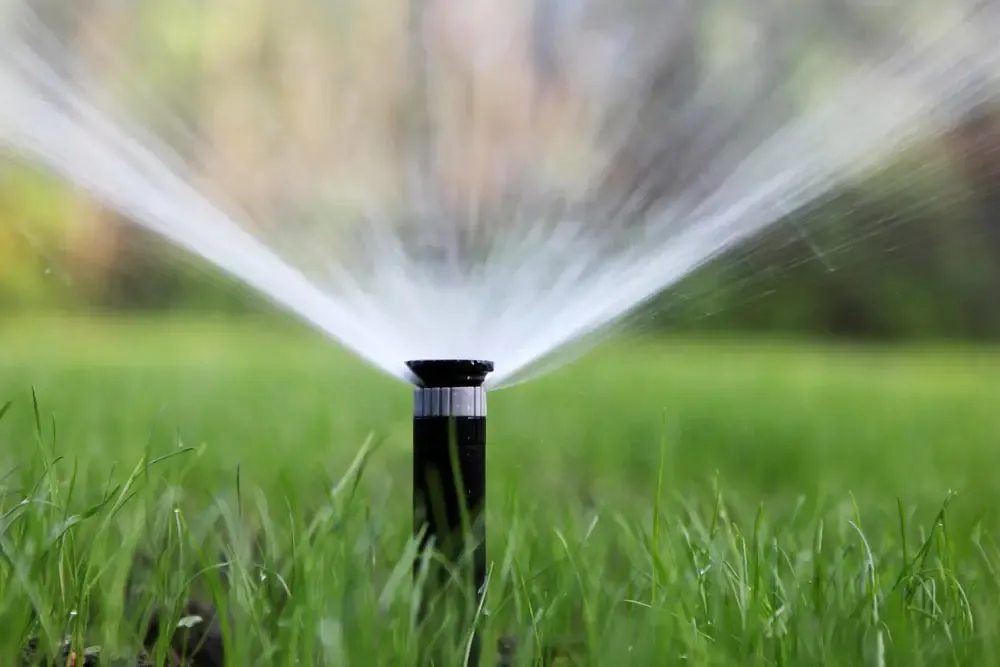
Pop-up irrigation spray head throwing a fan of water over a green lawn
Photo: Sid's Pond & Gardenscape
Draft.This guide is a draft. It has not yet been reviewed by an experienced installer or an engineer. Quantities and times come from the engine; the text may still change.
In this guide

Your project

The guide's typical project: 334.5 m² (3,600 sq ft) of watered lawn. The quantities below come from the calculator and drive every time in this guide.

The quantity calculation is not available right now.

Computed for: Quebec (province)
Estimated total working time
Beginner
43 person-h25 to 86 person-h
Intermediate
29 person-h18 to 52 person-h

The total and each step's time come from the same calculation as the estimator: the steps plus machine learning add up to the total. Planning steps (locate request, permits) keep the guide's fixed time.

Phase 1 · Assessment

Measure the water supply and design the zones

Everything starts with two measurements: static pressure (gauge on an outdoor tap, nothing running) and available flow (bucket test). The calculator uses only part of the flow for each zone, to keep good pressure at the heads.

A zone groups heads with the same needs: sunny lawn, shaded lawn, drip beds. Spray heads and rotors are not mixed in one zone, because they do not put down the same amount of water per hour.

Heads are spaced head to head: each one's spray reaches the next. Start with the corners, then the sides, then the interior.

The precipitation rate says how much water a zone puts down per hour: 60 times the zone's flow in L/min, divided by its area in m², gives mm/h (in imperial, 96.25 times the flow in US gpm divided by the area in ft² gives in/h). The run time follows from it.
  1. 01Measure static pressure and available flow[1, 2]

    1. Close every tap in the house, screw a pressure gauge onto an outdoor tap, open it and note the pressure.
    2. At the tap nearest the future connection, time how long a bucket of known volume takes to fill, tap wide open.
    3. Flow in L/min = bucket volume in litres, divided by the time in seconds, times 60. Repeat the test.
    4. Note the size of the water service and of the meter, if there is one.

    Done when : You have a static pressure read with nothing running, and two bucket tests that give similar flows.

    Safety : Tighten the gauge by hand only; if the tap leaks, shut the water off before removing it.

  2. 02Draw the zones and place the heads[1, 2, 3]

    1. Draw the yard to scale with the house, paths, beds and shaded areas.
    2. Group the areas with the same needs: each group becomes one or more zones.
    3. Put a head in each corner, then along the sides, then inside, checking that each head's spray reaches its neighbours.
    4. Choose rotors for large open lawns and spray heads for small irregular areas; keep drip for beds.
    5. Enter the areas, the heads' throw and flow in the calculator: it counts the heads and splits the zones to fit your flow.

    Done when : The scale plan shows every head with its arc, every spray reaching the neighbouring heads, and zones that mix neither head types nor different needs.

    Safety : Keep sprays away from windows, outdoor electrical outlets, the electric meter and surfaces where water would freeze in cold weather.

  3. 03Check the precipitation rate and run time[1, 2]

    1. For each zone, read the precipitation rate and the run time for the target amount of water in the calculator.
    2. On compacted or sloped ground, plan several short cycles rather than one long watering.
    3. If the calculator flags water moving too fast in a pipe, choose the next size up or split the zone.

    Done when : Each zone has a precipitation rate, a run time per cycle and a number of cycles, and no velocity warning remains open.

    Safety : Run times that are too long soak the paths: in spring and fall, water that freezes overnight makes surfaces slippery.

Phase 2 · Permits and locates

Locates, plumber, electrician and bylaws

Info-Excavation. Irrigation trenches are shallow, but they often cross cables: file the free request and dig by hand near the marks.

Plumbing. The connection to drinking water, the shut-off and the backflow preventer are plumbing: for others, that is work for a CMMTQ plumber. Piping installed downstream of the device is excluded from the Plumbing chapter of the Construction Code, and a landscaper can install it. An owner may do the plumbing of their own single-family house, but we recommend a plumber for this connection, which protects drinking water. Some cities also have their own requirements on connections: ask.

Electrical. The controller plugs into an existing outlet. Adding an outdoor outlet or circuit is work for a CMEQ electrician; a homeowner may not do it.

Watering. Cities set watering days and hours, often with rules specific to automatic systems.

  1. 01Request a locate and read the watering bylaw[2, 4, 5, 6, 7]

    1. File an Info-Excavation request for every trench route and wait for the marks.
    2. Read the municipal drinking water bylaw: permitted hours for automatic systems, any rain sensor requirement, bans during heat waves.
    3. Ask the city whether it requires a particular type of backflow preventer or a test.

    Done when : The marks are on the ground, and you know the permitted watering hours and the city's requirements for the connection.

    Safety : Do not run the trencher within 1 m of a mark; expose cables and pipes by hand.

  2. 02Have the connection and backflow preventer installed[2, 8, 9, 10]

    1. Have a CMMTQ plumber install the tap into the water service, the shut-off, the backflow preventer and the drain valve.
    2. Choose with them an accessible location, protected from frost or easy to remove in the fall.
    3. If you plan to inject fertilizer into the water, say so: the device then needs a higher level of protection.
    4. Keep the invoice, which must show their licence number.

    Done when : The connection, shut-off and backflow preventer are installed, accessible and labelled, and you have the plumber's invoice with their licence number.

    Safety : Never cut the main line without shutting off the water service and releasing the pressure; leave soldering and the tie-in to the plumber.

Phase 3 · Excavation

Dig the trenches and lay the pipe

Irrigation trenches are usually 15 to 30 cm deep. Under a lawn, lift the sod strips first so they can go back afterward; a rented trencher is much faster than a spade over long runs.

Rain Bird does not recommend poly pipe for the main line; it advises schedule 40 PVC of a good diameter. Under paths, run a sleeve so the pipe can be replaced without demolition.

  1. 01Dig the trenches and lay the pipe[2, 11]

    1. Stake every head and stretch a string along the routes.
    2. Lift the sod in strips and keep them shaded and moist.
    3. Dig to the planned depth with a trencher or spade, and remove stones from the bottom.
    4. Lay the pipe in the trenches without burying it, and cap the ends to keep the inside clean.
    5. Under paths and the driveway, push a sleeve through before running the pipe.

    Done when : All trenches are at the planned depth, the pipe is laid with capped ends, and the sleeves are in place under hard surfaces.

    Safety : A trencher can jump on a root or stone: hearing protection, safety boots, hands clear of the chain. Stay 1 m from the marks and dig by hand near utility lines.

Phase 4 · Base

Build the valve manifold and wire the controller

The valve manifold goes downstream of the backflow preventer, in an accessible buried box. Leave enough space between valves to replace one someday.

Before fitting heads, flush each zone by opening its valve by hand: debris left in the pipes would clog the nozzles.

The controller plugs into an existing outlet; the wires to the valves are low voltage. Note which station runs which zone and post the plan next to the controller.

  1. 01Build the manifold and flush each zone[2, 11]

    1. Connect the main line to the outlet of the backflow preventer, then mount the valves with space between them.
    2. Set the manifold in a valve box on a bed of clear stone.
    3. Turn the water on, then open each valve by hand until water runs clear at the end of every line.
    4. Close them and check that no fitting leaks under pressure.

    Done when : Each valve opens and closes its zone, water has run clear at the end of every line and no fitting leaks under pressure.

    Safety : PVC primer and cement: work in open air, with gloves and safety glasses. Shut the water off before undoing a fitting.

  2. 02Mount the controller and run the wires[2, 10, 11, 12]

    1. Mount the controller near an existing outlet, in the garage or out of the weather.
    2. Run a multi-conductor cable to the valve box: one wire per zone, plus a common.
    3. Make the connections in the box with waterproof connectors, noting each wire's colour.
    4. Add a rain sensor if your city requires one or if you want to skip watering after rain.

    Done when : Each controller station opens the right valve, and the zone plan is posted next to the controller.

    Safety : The controller plugs into an existing outlet; do not touch the 120 V wiring. A new outlet or circuit is work for a CMEQ electrician.

Phase 5 · Install and finish

Fit the heads, adjust, program and shut down for winter

Heads go in after flushing, at finished grade. At the bottom of a slope, a head fitted with a check valve stops the pipe water from draining out there after the zone shuts off.

Adjust each zone while it runs: arcs, throw, no water on the house or driveway. Then program short cycles on compacted soil, within permitted hours.

Before the first frosts, the system must be emptied: by manual drains, automatic drains or a compressed-air blowout. Rain Bird recommends a specialist for blowouts because of the risks, and asks that an above-ground backflow preventer be insulated without blocking its vents. In spring, turn the water on slowly and check every zone.

  1. 01Fit the heads and backfill the trenches[1, 2, 3, 11, 13]

    1. Screw each head onto a swing joint, at finished grade.
    2. At the bottom of slopes, use heads fitted with a check valve.
    3. Run each zone and adjust arcs and throw so every spray reaches the neighbouring heads without hitting the house or driveway.
    4. Backfill the trenches, tamping in small layers, then put the sod strips back and water them.

    Done when : Running, every spray reaches the neighbouring heads, no hard surface gets wet, no puddle forms at low heads after shut-off, and trenches are backfilled flush with the lawn.

    Safety : Never lean over a head when the zone starts: the spray comes out hard. Wear glasses while adjusting.

  2. 02Program and test each zone[1, 2, 7]

    1. Enter each zone's calculated run time and number of cycles.
    2. Set the start times within the hours your city allows.
    3. Let a full cycle run and look for runoff, dry spots and leaks.
    4. Use rain mode on rainy days.

    Done when : A full cycle runs within permitted hours with no runoff onto paths and no dry spot.

    Safety : Check that no spray reaches an outdoor outlet, a light fixture or the electric meter.

  3. 03Shut the system down before frost and start it up in spring[2, 13, 14]

    1. Before the first frosts, shut the water off at the system's shut-off.
    2. Empty the pipes: open the manual drains, let the automatic drains work, or have a specialist do a compressed-air blowout.
    3. Insulate the above-ground backflow preventer and exposed pipe without blocking the device's vents or drains.
    4. Put the controller in rain mode.
    5. In spring, turn the water on slowly, check for leaks zone by zone and have the device checked if your city requires it.

    Done when : Before frost, the water is off, the pipes are empty, the backflow preventer is insulated with its vents clear, and the controller is in rain mode.

    Safety : Compressed air is dangerous: safety glasses, never your face over a head, never more pressure than the makers of your pipe and heads allow. Rain Bird recommends leaving the blowout to a specialist.

Common mistakes

Mixing needs or head types in one zone[1]

What happens

Part of the zone is soaked while the rest dries out: you overwater to compensate, and the lawn yellows in patches.

How to avoid it

Make separate zones for sun, shade and drip, and keep one head type per zone.

Spacing heads beyond their throw[3]

What happens

Dry strips appear between heads, especially in corners and along edges.

How to avoid it

Keep head-to-head coverage: each spray reaches its neighbours, starting with the corners.

Putting too many heads on one zone[1]

What happens

Pressure drops, sprays fall short and leave gaps in coverage.

How to avoid it

Measure the available flow and let the calculator split heads into zones that stay under the limit.

Connecting without a backflow preventer[8, 9]

What happens

System water that has touched soil, and sometimes fertilizer, can flow back into the drinking water of the house and the network.

How to avoid it

Have a CMMTQ plumber install the connection and the device, and lay the irrigation piping downstream only.

Fitting heads before flushing the lines[11]

What happens

Sand and PVC shavings left in the pipes clog the nozzles on the first run.

How to avoid it

Open each valve by hand until the water runs clear, then fit the heads.

Forgetting to empty the system before frost[13, 14]

What happens

Water freezes in the pipes, valves and backflow preventer and bursts them; you find the damage in spring.

How to avoid it

Plan the shutdown before the first frosts, every fall, and have a specialist do the air blowout.

Using poly pipe for the main line[11]

What happens

The main line stays under pressure all the time; a less rigid or undersized pipe causes pressure loss and leaks.

How to avoid it

Use schedule 40 PVC of a good diameter for the main line, as Rain Bird recommends.

Leaving out check valves at the bottom of slopes[1]

What happens

After each watering, the pipe water drains out of the lowest head and makes a soggy spot.

How to avoid it

Fit heads with a check valve at the bottom of slopes.

Programming outside permitted hours[7]

What happens

You risk a notice or a fine, and watering in midday heat wastes water.

How to avoid it

Read your city's bylaw before programming and use rain mode or a rain sensor.

When to call a pro or an engineer

  • PlumberApplies to the typical project

    The connection to drinking water, the shut-off and the backflow preventer are plumbing: done for others, they require a CMMTQ plumber. For your own house, we strongly recommend a plumber.[8, 9]

  • Plumber

    Injecting fertilizer into the irrigation water raises the risk to drinking water: the plumber must choose a backflow preventer with a higher level of protection.[8]

  • Electrician

    The controller needs a new outlet: that is work for a CMEQ electrician. A homeowner may not do their own electrical work.[10, 12]

  • LocateApplies to the typical project

    Trenches often cross cables: file a free Info-Excavation request and dig by hand near the marks.[4, 6]

  • MunicipalityApplies to the typical project

    Check the municipal drinking water bylaw: permitted hours for automatic watering, rain sensor, backflow preventer requirements.[7]

Rules in Quebec

  • LicenceAll of Quebec

    Connecting an irrigation system to drinking water and the backflow preventer are plumbing work: done for others, they are reserved to CMMTQ members (subcategory 15.5). Piping installed downstream of the device is excluded from the Plumbing chapter of the Construction Code.[8, 9]

    Checked October 10, 2026

  • LicenceAll of Quebec

    A new outlet or circuit for the controller is electrical work: it must be done by a CMEQ contractor, even at your own home.[10, 12]

    Checked October 10, 2026

  • PermitAll of Quebec

    Cities regulate watering with drinking water (days, hours, automatic systems, temporary bans) and sometimes connections. Read your municipality's bylaw before installing.[7]

    Checked October 10, 2026

  • LocateAll of Quebec

    Before digging trenches, file a free Info-Excavation request. The RBQ asks contractors to file at least 4 business days before work.[4, 5]

    Checked October 10, 2026

  • Consumer protectionAll of Quebec

    Ask for a written contract that details the zones, heads, the plumber's connection, the total price, the warranty and, if included, the fall shutdown and spring start-up. A contract signed at your home after a sales visit can be cancelled within 10 days.[15]

    Checked October 10, 2026

Words used

Sources

  1. 1.

    Common Design Problems · Rain Bird

    Consulted October 10, 2026Source page

    • Rain Bird recommends independent zones by plant need, check valves under heads at the bottom of slopes, short cycles on compacted soil and pressure regulation, because high pressure makes heads mist and low pressure leaves gaps.
  2. 2.

    Experience curve effects · Wikipedia

    Consulted October 10, 2026Source page

    • Under Wright's law, work time falls by a fixed ratio each time experience doubles; published ratios run from 0.75 to 0.90, which gives the beginner and intermediate factors used here.
  3. 3.

    How to Know Where to Place Sprinkler Heads in Your Yard · Rain Bird

    Consulted October 10, 2026Source page

    • Rain Bird calls for head-to-head coverage: each head must throw water to the next one; put a head in each corner first, then along the sides at intervals matching the head's throw.
  4. 4.

    Travaux d'excavation · Régie du bâtiment du Québec

    Consulted October 10, 2026Source page

    • The RBQ asks contractors to file a free Info-Excavation request at least 4 business days before work; the request stays valid for up to 180 days.
  5. 5.

    What to do before you dig (underground lines) · Hydro-Québec

    Consulted October 10, 2026Source page

    • Hydro-Québec notes that Info-Excavation is free and advises allowing 72 hours, or 3 business days when a pipeline is involved.
  6. 6.

    Fiche technique 34, Protéger les services publics souterrains · APSAM (Association paritaire pour la santé et la sécurité du travail, secteur affaires municipales)

    Consulted October 10, 2026Source page

    • APSAM asks that machines stay at least 1 m on each side of the marks and that lines be exposed by hand.
  7. 7.

    Prix de la tourbe au Québec : combien coûte le gazon en rouleau en 2026? · Soumission Rénovation

    Published July 6, 2026Consulted October 10, 2026Source page

    • The guide reminds readers to check municipal watering rules, which many cities also apply to new lawns. (arrosage)
  8. 8.

    Code de construction, RLRQ c. B-1.1, r. 2 · LégisQuébec, Éditeur officiel du Québec

    Consulted October 10, 2026Source page

    • The Plumbing chapter of the Construction Code also applies outside the building on the property, but excludes the installation downstream of an individual-protection backflow preventer. (art. 3.02 et 3.02.01)
  9. 9.

    Liste des sous-catégories de licence (document 1592, édition 2025-10) · Régie du bâtiment du Québec

    Consulted October 10, 2026Source page

    • Plumbing done for others, outdoor plumbing included, falls under subcategory 15.5, reserved to CMMTQ members.
  10. 10.

    Travaux que vous pouvez faire vous-même · Régie du bâtiment du Québec

    Consulted October 10, 2026Source page

    • An owner may do work on their own single-family house without a licence, except electrical, gas and petroleum installations, which must always be done by a contractor holding the right licence.
  11. 11.

    Sprinkler System Installation Guide · Rain Bird

    Consulted October 10, 2026Source page

    • Rain Bird describes the steps: stake heads and routes, dig 6 to 12 in (15 to 30 cm) trenches, connect according to local code, build the valve manifold with a backflow preventer if required, flush the lines before fitting heads, then wire and test each zone.
    • Rain Bird notes that poly pipe is mostly used in cold climates but does not recommend it for the main line, and advises schedule 40 PVC of a good diameter. (pipe)
  12. 12.

    Loi sur les maîtres électriciens, RLRQ c. M-3 · Gouvernement du Québec (LégisQuébec)

    Consulted October 10, 2026Source page

    • Electrical installation work done for others is reserved to CMEQ members. (art. 1)
  13. 13.

    Quel système d'irrigation choisir pour un jardin résidentiel? · Soumission Rénovation

    Published November 8, 2023Consulted October 10, 2026Source page

    • A pop-up head costs 9 to 45 CAD depending on type, part only; it is the only sourced irrigation price so far.
    • The Quebec guide advises emptying the buried circuit before the first frosts, with compressed air or a drain valve, so water does not freeze and burst the pipes.
  14. 14.

    How do I winterize my irrigation system? · Rain Bird

    Consulted October 10, 2026Source page

    • Rain Bird describes three ways to empty the system (manual drain, automatic drain, compressed-air blowout), recommends a specialist because of the risks, and asks that an above-ground backflow preventer be insulated without blocking its vents or drains.
  15. 15.

    Request a contract (lawn and landscaping) · Office de la protection du consommateur

    Consulted October 10, 2026Source page

    • The OPC recommends a written contract describing the services, their duration, the products, the total price, payment terms and the warranty; a contract made with an itinerant merchant can be cancelled within 10 days.

Review and history

Status
Draft awaiting review
Last reviewed
October 10, 2026
Next review due
October 10, 2027
Reviewers
Rédaction paysagement (editor)
Change log
  1. October 10, 2026

    First version, awaiting review by an irrigation installer and a plumber. Municipal watering bylaws and exact backflow device requirements remain to be checked city by city.