Skip to content
paysagement
Guide · Grading

Grading the yard around your house

Ground that falls away from the house keeps water off the foundation. Steps: read the existing slopes, cut high spots, fill in compacted layers and lead water to a swale or the street without sending it to the neighbour. Quantities and hours come from the grading calculator.
Level : IntermediateDraftReviewed October 10, 2026Next review: October 10, 202721 sources
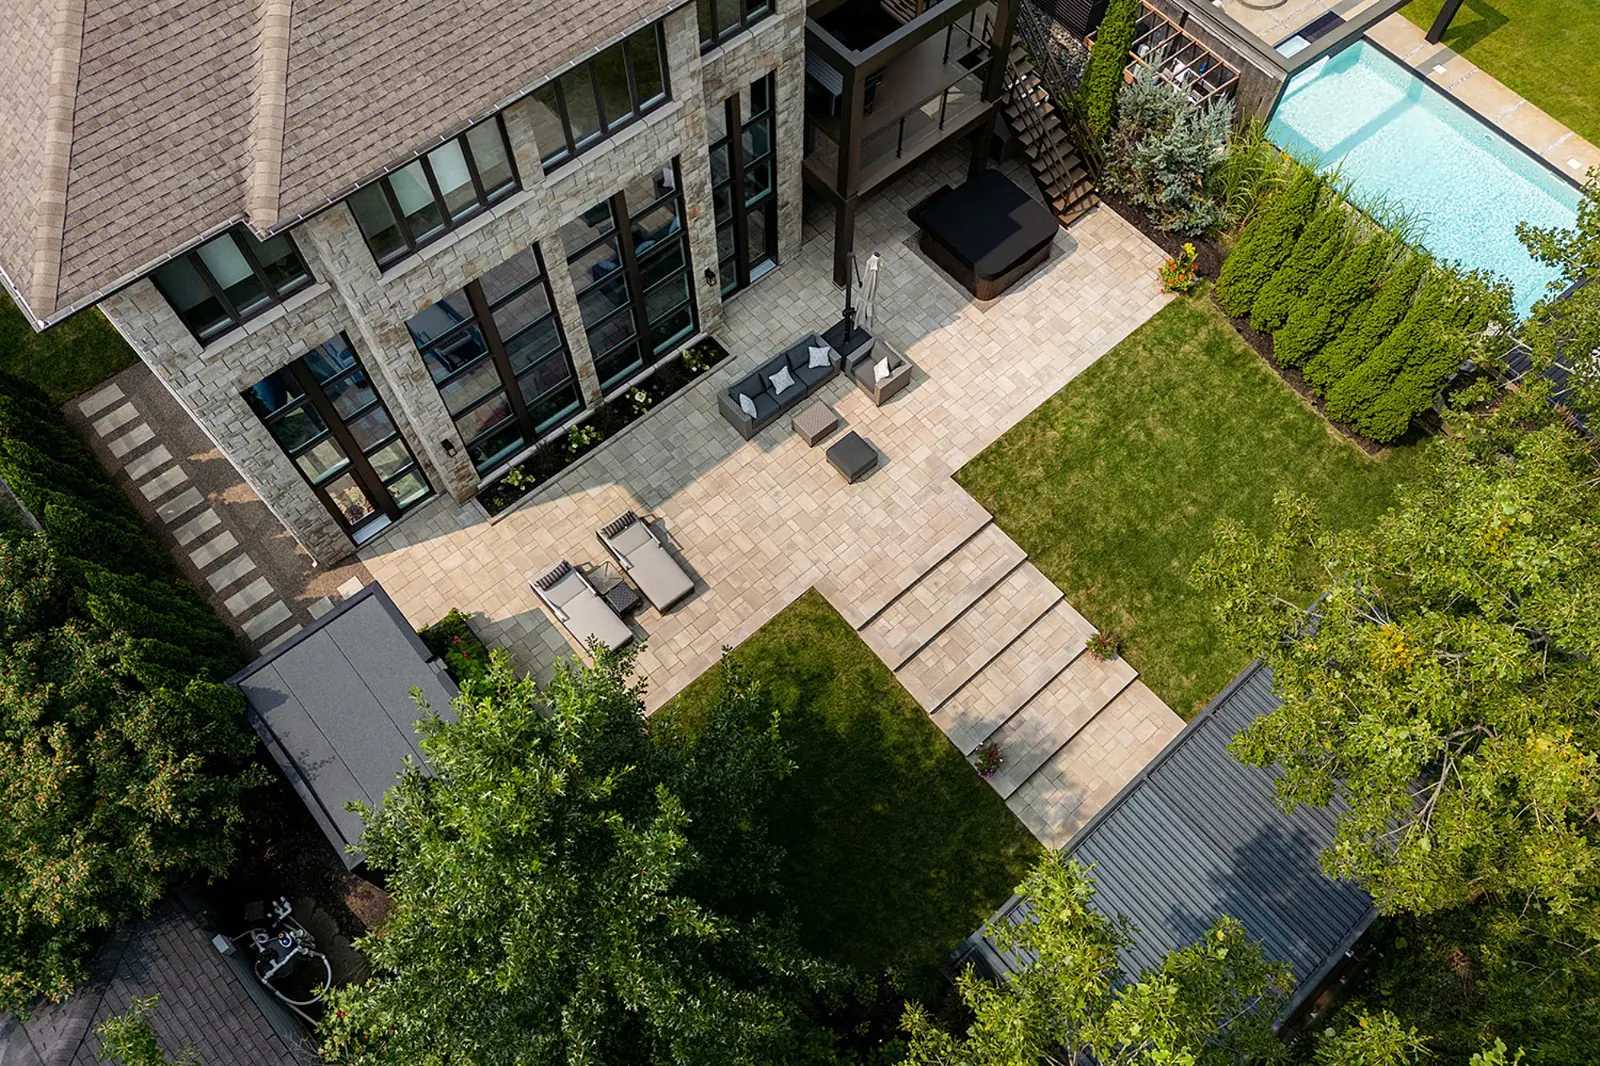
Sloped backyard built in terraces with patios, walls and lawn, aerial view
Photo: Rinox
Draft.This guide is a draft. It has not yet been reviewed by an experienced installer or an engineer. Quantities and times come from the engine; the text may still change.
In this guide

Your project

The guide's typical project: 100 m² (1,076 sq ft) of reshaped ground. The quantities below come from the calculator and drive every time in this guide.
MaterialQuantity
Imported fill (if the site soil is not enough)2 m³ (2.6 cu yd)
Computed for: Quebec (province)
Estimated total working time
Beginner
46 person-h30 to 75 person-h
Intermediate
31 person-h22 to 46 person-h

The total and each step's time come from the same calculation as the estimator: the steps plus machine learning add up to the total. Planning steps (locate request, permits) keep the guide's fixed time.

Phase 1 · Assessment

Understand where water goes today

The goal is positive drainage: the ground falls away from the foundation on every side, then the water keeps going to a place that can take it (lawn, planting bed, swale, street) without crossing the neighbour's lot.

Two benchmarks guide the work. APCHQ technical sheet S3-05 starts from about a 10% slope over 2 m before settlement, to end near 2%. Calgary's guide, written for a cold climate, asks for at least 4% over the first 1.2 m and at least 2% on the lawn. Aim for the steeper of the two final slopes next to the house.

Watch the yard during or right after a good rain: puddles, downspout outlets, window wells, damp spots in the basement. Those are your starting points.
  1. 01Measure the grades around the foundation[1, 2, 3]

    1. At each corner of the house and at regular intervals along the walls, drive one stake against the foundation and a second one 2 m out, square to the wall.
    2. Stretch a string between them, level it with a line level, then measure from the string down to the ground at each stake. A rented laser level does the same job faster.
    3. The slope in percent is the height difference divided by the distance, times 100. Write it as negative if the ground rises toward the house.
    4. Also note the ground height below the bottom of the siding and under each window well, and where the downspouts discharge.

    Done when : Every side of the house has at least two measured slopes, written on a sketch with the low spots, window wells and downspout outlets.

    Safety : Find the gas meter, the electrical service and any cables before driving a stake. Do not drive anything deep before the Info-Excavation locate.

  2. 02Plan where the water goes[2, 3, 4]

    1. On the sketch, draw arrows that start at the foundation and lead to a lawn, a planting bed, a swale or the street.
    2. Pick an outlet for each area: water must never end in a closed hollow or against another building.
    3. If water has to run along a property line, plan a grassed swale on your side with a continuous fall to the front or back.
    4. Mark the areas to cut (high spots) and to fill (hollows), then enter their areas and average depths in the calculator.

    Done when : The sketch shows, for each area, the target slope, the flow direction up to an outlet, and the cut and fill areas with their size.

    Safety : If water already crosses the property line naturally, do not block it or increase it: talk to your neighbour before the work.

Phase 2 · Permits and locates

Locates, permits and neighbours

Info-Excavation is free. The RBQ asks contractors to file at least 4 business days before digging; Hydro-Québec advises homeowners to allow 72 hours, or 3 business days when a pipeline is involved. Even shallow grading disturbs the ground: file the request.

Municipality. Some cities regulate bringing in fill, the height and slope of banks, or work near a watercourse. Sherbrooke publishes a sheet on fill; Quebec City regulates banks. Call the planning department before you order soil.

Neighbour. The Civil Code (art. 979) makes lower land receive natural runoff, but forbids the owner of higher land from making things worse. Raising the ground near the line or concentrating water toward the neighbour can make you liable.

Licence. The RBQ lists landscaping on private land among work that needs no licence. Excavation and earthwork done as construction work (for a pool, a foundation) fall under subcategory 2.5: ask the contractor which one they hold.

  1. 01Request a locate and check municipal rules[3, 5, 6, 7]

    1. File a locate request with Info-Excavation (online or by phone) describing the whole work area.
    2. Wait for the marks on the ground or the "no facilities" answers from each network owner, and keep the marks visible for the whole job.
    3. Ask your municipality whether bringing in fill, changing a bank or working near a watercourse needs a certificate.
    4. Pull out your certificate of location to see where the property line runs.

    Done when : You have an Info-Excavation request number, the marks are on the ground (or every answer is in) and you know whether a municipal certificate is required.

    Safety : Never dig with a machine within 1 m of a mark; expose pipes and cables by hand.

Phase 3 · Excavation

Strip and cut the high spots

Keep the topsoil apart from the start: it will become the finished surface again. Then lower the high spots and move the soil to the hollows marked on the sketch.

Dug soil takes more room than it did in the ground: that is swell. The calculator accounts for it in wheelbarrow trips, loader time and the container for surplus. Clay swells more than sand.

If you dig a trench deep enough to step into, CNESST rules apply: walls shored or sloped back beyond 1.2 m, soil and material at least 1.2 m from the edge.

  1. 01Strip the topsoil and stockpile it[2, 3]

    1. Cut the sod with a sod cutter or a spade, then remove the topsoil to the depth the calculator shows.
    2. Pile it separately on a tarp, away from the foundation and window wells. Do not mix it with subsoil or clay.
    3. Cover the pile if rain is forecast.

    Done when : The whole work area is bare and the topsoil sits in its own pile, with no lumps of subsoil.

    Safety : A sod cutter vibrates and pulls: safety boots, hearing protection, gloves, and never back up toward an obstacle. Lift sod strips with your legs, back straight.

  2. 02Cut the high spots and move soil to the hollows[3, 8, 9]

    1. Work from high to low, following the cut areas on the sketch.
    2. Reuse clean soil as fill where the sketch says; set aside roots, large stones and debris.
    3. Surplus goes to a soil container or the ecocentre, depending on your city's rules.
    4. Never push soil against the siding or into a window well.

    Done when : The high spots are at the planned level, checked with the string or laser, and the moved soil sits in the hollows, ready to be compacted.

    Safety : Run a compact loader only after reading the rental manual: nobody nearby, no work across a slope, bucket low when travelling. Stay 1 m from locate marks.

Phase 4 · Base

Fill in layers and compact

Fill goes down in thin layers, each one compacted before the next; the engine uses layers of 200 mm at most. One thick layer settles for months and makes a new hollow that sends water back toward the house.

Next to the foundation, build slightly above the final slope to allow for settlement, as the APCHQ suggests. Keep the topsoil for the top only: under a lawn it is typically 100 to 150 mm.

Never fill on frozen ground or with frozen soil: the spring thaw would make it all settle.

  1. 01Spread fill in thin layers and compact each one[1, 3, 10, 11]

    1. Spread fill in layers no thicker than the calculator shows.
    2. Dampen it lightly if dusty; wait if it is soaked.
    3. Run the plate compactor over each layer several times, overlapping the passes.
    4. Near the foundation, build slightly above the final slope to make up for settlement.
    5. Stop the fill at the planned topsoil depth below the finished surface.

    Done when : Each layer is firm underfoot, with no deep heel print, and the rough surface follows the target slope with the planned extra height near the foundation.

    Safety : Plate compactor: hearing protection, safety boots, anti-vibration gloves. Do not hit the foundation, window wells or downspout pipes with the plate.

  2. 02Check the slopes before replacing the topsoil[2, 3]

    1. Measure again at the same stakes as at the start.
    2. Compare each slope with the target on the sketch and fix any hollow.
    3. Run a garden hose near the foundation: the water must move away from the house and follow the swale to the outlet.

    Done when : At every stake the slope runs away from the house and meets the target, and the hose test leaves no puddle along the foundation or in the swale.

    Safety : Fill in or flag open holes and trenches during the checks, especially if children are around.

Phase 5 · Install and finish

Finish, downspouts and protecting the soil

Shape the surface, put the topsoil back, then cover it quickly with sod, seed or mulch: bare soil erodes in the first heavy rain (see the sod guide).

Downspouts. Calgary's guide recommends extending them 1.2 to 1.8 m, with a splash pad at the outlet, and discharging onto lawn or a planting bed rather than a driveway or sidewalk.

The following spring, walk the yard again with the level: new fill keeps settling during the first year.

  1. 01Fine-grade the surface[2, 3]

    1. Rake the surface along the slopes, removing stones and clods.
    2. Fill small hollows and take down bumps.
    3. Lay a straightedge or a board on the ground in several directions to find hollows where water would sit.

    Done when : The straightedge shows no closed hollow and the surface follows the slopes checked in the previous step.

    Safety : Repeated raking tires the back and shoulders: alternate tasks and take breaks.

  2. 02Put the topsoil back[2, 3]

    1. Spread the stockpiled topsoil over the whole area to the planned depth.
    2. Keep the finished surface below the bottom of the siding and below the window wells.
    3. Check the slope near the foundation again: the added soil must not create a dip.

    Done when : Topsoil covers the whole area at the planned depth and the finished surface keeps the checked slopes.

    Safety : Load the wheelbarrow half full on slopes and keep the handles low going downhill.

  3. 03Extend downspouts and protect bare soil[2, 3]

    1. Extend each downspout so water lands well away from the foundation, on a splash pad.
    2. Point the outlets at lawn or a planting bed, never at the driveway, the sidewalk or the neighbour's lot.
    3. Cover the soil the same day or within days: sod, protected seed or mulch.
    4. After the first heavy rain, walk the yard and fix anything that does not drain.

    Done when : Every downspout discharges onto grass or planting, away from the foundation, and no area of soil is left bare.

    Safety : Secure the extensions so they do not roll underfoot; in winter, an outlet onto a hard surface makes ice.

Common mistakes

Leaving the ground sloping toward the house[1, 2]

What happens

Water collects against the foundation, seeps into the basement and wears the concrete; in winter, the soaked soil freezes against the wall.

How to avoid it

Measure before and after the work and aim for at least 4% over the first 1.2 m, with extra height for settlement.

Sending water onto the neighbour's lot[4, 12]

What happens

Raised ground or a concentrated outlet that worsens the flow onto lower land can make you civilly liable and lead to a dispute.

How to avoid it

Keep the natural flow, put the swale on your side of the line and lead water to the street or an infiltration area on your own lot.

Filling in one thick layer[10]

What happens

The fill settles for months and creates new hollows that bring water back toward the house.

How to avoid it

Spread fill in thin layers and compact each one before the next.

Using topsoil as fill[2]

What happens

The organic matter breaks down and the ground sinks; it also wastes the best soil, which is then missing for the lawn.

How to avoid it

Strip and keep the topsoil apart, fill with clean subsoil, then put the topsoil back on top.

Letting downspouts empty at the foot of the wall[2]

What happens

All the roof water lands in one spot, gullies the new soil and saturates the area you just graded.

How to avoid it

Extend each downspout 1.2 to 1.8 m, add a splash pad and discharge onto a surface that absorbs water.

Making a bank too steep[2, 13]

What happens

The soil erodes, the lawn will not take and mowing becomes dangerous; a steep bank can slide.

How to avoid it

Stay under a 33% slope, terrace the ground or plan a properly designed wall, and check your city's limits.

Digging a swale without a continuous fall[2]

What happens

Water sits in the swale, the grass rots and mosquitoes move in; the water ends up spilling back toward the house.

How to avoid it

Give a grassed swale at least a 2% fall and test it with a hose all the way to the outlet.

Filling on frozen ground or with frozen soil[11]

What happens

At thaw the ice melts, the fill sinks and the slopes reverse in places.

How to avoid it

Plan grading between the spring thaw and the first frosts, and never place frozen material.

Digging without a locate request[5, 6]

What happens

A torn cable or gas line puts lives at risk, cuts service to the street and makes you liable for repairs.

How to avoid it

File the free Info-Excavation request before digging and expose lines by hand near the marks.

When to call a pro or an engineer

  • LocateApplies to the typical project

    All grading disturbs the ground: file a free Info-Excavation request before you start, and keep machines 1 m from the marks.[5, 7]

  • Land surveyor

    You are changing the grade near the property line: have a land surveyor confirm the line and make sure you do not worsen the flow onto the neighbour (Civil Code, art. 979).[4, 12]

  • Contractor

    A slope over 33% will not hold without a wall or stabilization. Have a stabilized bank or wall designed; depending on the soil and what it holds back, an engineer may be required whatever the height.[2, 14]

  • Engineer

    The lot is in a landslide-prone zone: do not fill or cut a bank without a geotechnical engineer's advice and the municipality's approval.[13, 14]

  • Municipality

    Work near a watercourse or shoreline: special rules often apply. Get the municipality's approval before moving soil.[13]

  • MunicipalityApplies to the typical project

    You are adding fill: some cities regulate bringing in soil and changing ground levels. Check with your municipality before ordering.[15]

Rules in Quebec

  • NeighboursAll of Quebec

    Lower land receives the water that flows naturally from higher land. The lower owner may not block that flow, and the higher owner may not make the lower land's situation worse (Civil Code of Québec, art. 979). Do not send water toward your neighbour.[4, 12]

    Checked October 10, 2026

  • LocateAll of Quebec

    Before digging, file a free request with Info-Excavation. The RBQ asks contractors to file at least 4 business days before work; it stays valid for up to 180 days. Keep machines at least 1 m from the marks.[5, 6, 7, 16]

    Checked October 10, 2026

  • LicenceAll of Quebec

    Landscaping on private land does not need an RBQ licence. A contractor doing excavation and earthwork as construction work (pool, foundation) must hold subcategory 2.5 or a licence that includes it.[17, 18]

    Checked October 10, 2026

  • PermitSherbrooke

    Sherbrooke publishes a technical sheet on fill: check whether bringing in soil needs a certificate before the work.[15]

    Checked October 10, 2026

  • PermitQuébec

    Quebec City regulates the height and slope of banks, alone or combined with a wall, and applies special rules near watercourses and steep slopes.[13]

    Checked October 10, 2026

  • SafetyAll of Quebec

    Never step into a trench deeper than 1.2 m unless its walls are shored or sloped back. Keep soil and materials at least 1.2 m from the edge, and machines at least 3 m back.[9]

    Checked October 10, 2026

  • Consumer protectionAll of Quebec

    If you hire a contractor, ask for a written contract that describes the work, materials, total price, payment terms and warranty. A contract signed at your home after a sales visit can be cancelled within 10 days.[19, 20]

    Checked October 10, 2026

Words used

Sources

  1. 1.

    Fiche technique S3-05 : fondations de béton (détail du nivellement et du drain) · APCHQ

    Consulted October 10, 2026Source page

    • The APCHQ recommends ground that moves water away from the foundation over at least 2 m: about a 10% slope before compaction, to end near 2% once the soil has settled. (meilleure pratique, aménagement de la pente)
  2. 2.

    Guide to Lot Drainage · City of Calgary

    Consulted October 10, 2026Source page

    • Calgary requires at least 4% over the first 1.2 m along a foundation, at least 2% in lawns and grassed swales, and no more than 33% without a retaining wall. (section 4.1, Slope Rules)
    • Calgary asks that a swale be deep and wide enough to hold the lot's runoff, with at least a 2% slope when grassed, and notes that neighbours share upkeep of a swale on the property line. (section 5.2, Side Yard Swales)
    • Lawns typically have 100 to 150 mm of topsoil; a layer of 300 mm or more holds rainwater better. (section 5.4, Resilient Landscaping)
    • Calgary recommends extending downspouts 1.2 to 1.8 m, placing a splash pad at the outlet, discharging onto lawn or planting rather than a driveway or sidewalk, and staying at least 2 m from sidewalks and streets. (section 4.1, Roof Drainage, Eavestroughs and Downspouts)
  3. 3.

    Experience curve effects · Wikipedia

    Consulted October 10, 2026Source page

    • Under Wright's law, work time falls by a fixed ratio each time experience doubles; published ratios run from 0.75 to 0.90, which gives the beginner and intermediate factors used here.
  4. 4.

    Écoulement des eaux (rapports de voisinage) · Gouvernement du Québec

    Consulted October 10, 2026Source page

    • Lower land must receive the water that flows naturally from higher land; its owner may not block that flow, and the owner of the higher land may not make the lower land's situation worse.
  5. 5.

    Travaux d'excavation · Régie du bâtiment du Québec

    Consulted October 10, 2026Source page

    • The RBQ asks contractors to file a free Info-Excavation request at least 4 business days before work; the request stays valid until the end date on it, for at most 180 days.
  6. 6.

    What to do before you dig (underground lines) · Hydro-Québec

    Consulted October 10, 2026Source page

    • Hydro-Québec notes that Info-Excavation is free throughout Quebec and advises allowing 72 hours, or 3 business days when a pipeline is involved.
  7. 7.

    Fiche technique 34, Protéger les services publics souterrains · APSAM (Association paritaire pour la santé et la sécurité du travail, secteur affaires municipales)

    Consulted October 10, 2026Source page

    • APSAM asks that machines stay at least 1 m on each side of the marks, that lines be exposed by hand, and treats any hole dug as digging.
  8. 8.

    Estimating for Mission Requirements (reproduces FM 5-434 Earthmoving Operations, Table 1-1) · United States Marine Corps, TECOM

    Consulted October 10, 2026Source page

    • The FM 5-434 factors convert bank volume to loose volume (1.25 for loam, 1.43 for clay) and to compacted volume (0.90 for loam and clay). (Table 1-1)
  9. 9.

    Code de sécurité pour les travaux de construction, RLRQ c. S-2.1, r. 4 · Gouvernement du Québec (LégisQuébec)

    Consulted October 10, 2026Source page

    • A trench a worker enters must be shored, with exceptions such as walls sloped under 45 degrees starting less than 1.2 m above the bottom; no material within 1.2 m of the edge and no machine within 3 m. (art. 3.15.3)
  10. 10.

    Installation guide, Walls and design charts · Techo-Bloc (hosted by dealer Stonewood Products)

    Consulted October 10, 2026Source page

    • Techo-Bloc limits compacted backfill lifts behind a wall to 200 mm; the engine reuses this value as its general fill lift, as an estimate. (s. 05B)
  11. 11.

    DTNI-3C, Mise en oeuvre des pavés et des dalles en béton ou en pierre naturelle sur lit de pose granulaire · Ville de Montréal

    Published October 3, 2024Consulted October 10, 2026Source page

    • Montreal's specification forbids placing frozen aggregate. (s. 7.4.3)
  12. 12.

    Code civil du Québec, RLRQ c. CCQ-1991 · LégisQuébec, Éditeur officiel du Québec

    Consulted October 10, 2026Source page

    • Article 979 of the Civil Code sets the rule of natural water flow between neighbouring lands. (art. 979)
  13. 13.

    Fiche 60 : Mur de soutènement, clôture et talus combinés (juillet 2023) · Ville de Québec

    Consulted October 10, 2026Source page

    • Quebec City regulates the height and slope of banks and applies special rules near watercourses and steep slopes.
  14. 14.

    Les murs de soutènement · Ordre des ingénieurs du Québec

    Consulted October 10, 2026Source page

    • For the OIQ, height alone does not decide whether a retaining wall needs an engineer: the slope above, the soil, the surcharge and the slide risk count too.
  15. 15.

    Fiche technique no 15 : Remblai · Ville de Sherbrooke

    Consulted October 10, 2026Source page

    • Sherbrooke publishes a separate technical sheet on fill, a sign that some cities regulate bringing in soil.
  16. 16.

    Info-Excavation · Info-Excavation

    Consulted October 10, 2026Source page

    • Info-Excavation is the service where the locate request for underground networks is filed.
  17. 17.

    Guide pour déterminer le besoin d'une licence et la sous-catégorie pertinente : sous-catégorie 2.7, Entrepreneur en travaux d'emplacement · Régie du bâtiment du Québec

    Consulted October 10, 2026Source page

    • The RBQ lists landscaping on private land among work that needs no licence.
  18. 18.

    Liste des sous-catégories de licence (document 1592, édition 2025-10) · Régie du bâtiment du Québec

    Consulted October 10, 2026Source page

    • Subcategory 2.5 covers excavation and earthwork: digging, moving, compacting and levelling soil or granular material.
  19. 19.

    Request a contract (lawn and landscaping) · Office de la protection du consommateur

    Consulted October 10, 2026Source page

    • The OPC recommends a written contract describing the services, products, total price, payment terms and warranty; a contract made with an itinerant merchant can be cancelled within 10 days.
  20. 20.

    Signer un contrat de rénovation · Régie du bâtiment du Québec

    Consulted October 10, 2026Source page

    • The RBQ advises putting the licence number, NEQ, GST and QST numbers and the business's exact legal name in the contract, and paying the smallest possible deposit.
  21. 21.

    Document explicatif : gestion des eaux pluviales · Ville de Saint-Rémi

    Consulted October 10, 2026Source page

    • A Quebec municipality explains to residents how to manage stormwater on their lot, including the slope to give near the building (document read through an excerpt only).

Review and history

Status
Draft awaiting review
Last reviewed
October 10, 2026
Next review due
October 10, 2027
Reviewers
Rédaction paysagement (editor)
Change log
  1. October 10, 2026

    First version, awaiting review by an installer and, for banks, by an engineer.